 PackScene - AI on-model photos for Shopify
Turn flat-lay packshots into on-model photos
You have thirty new t-shirts photographed flat on a table and no budget for a model day. PackScene takes those photos off your Shopify products, puts each garment on a generated model, and sends the ones you approve back to the product page.
It works on clothing and anything else worn on a body. Furniture and kitchenware have nothing to go on, so this is the wrong app for those.
Packshot
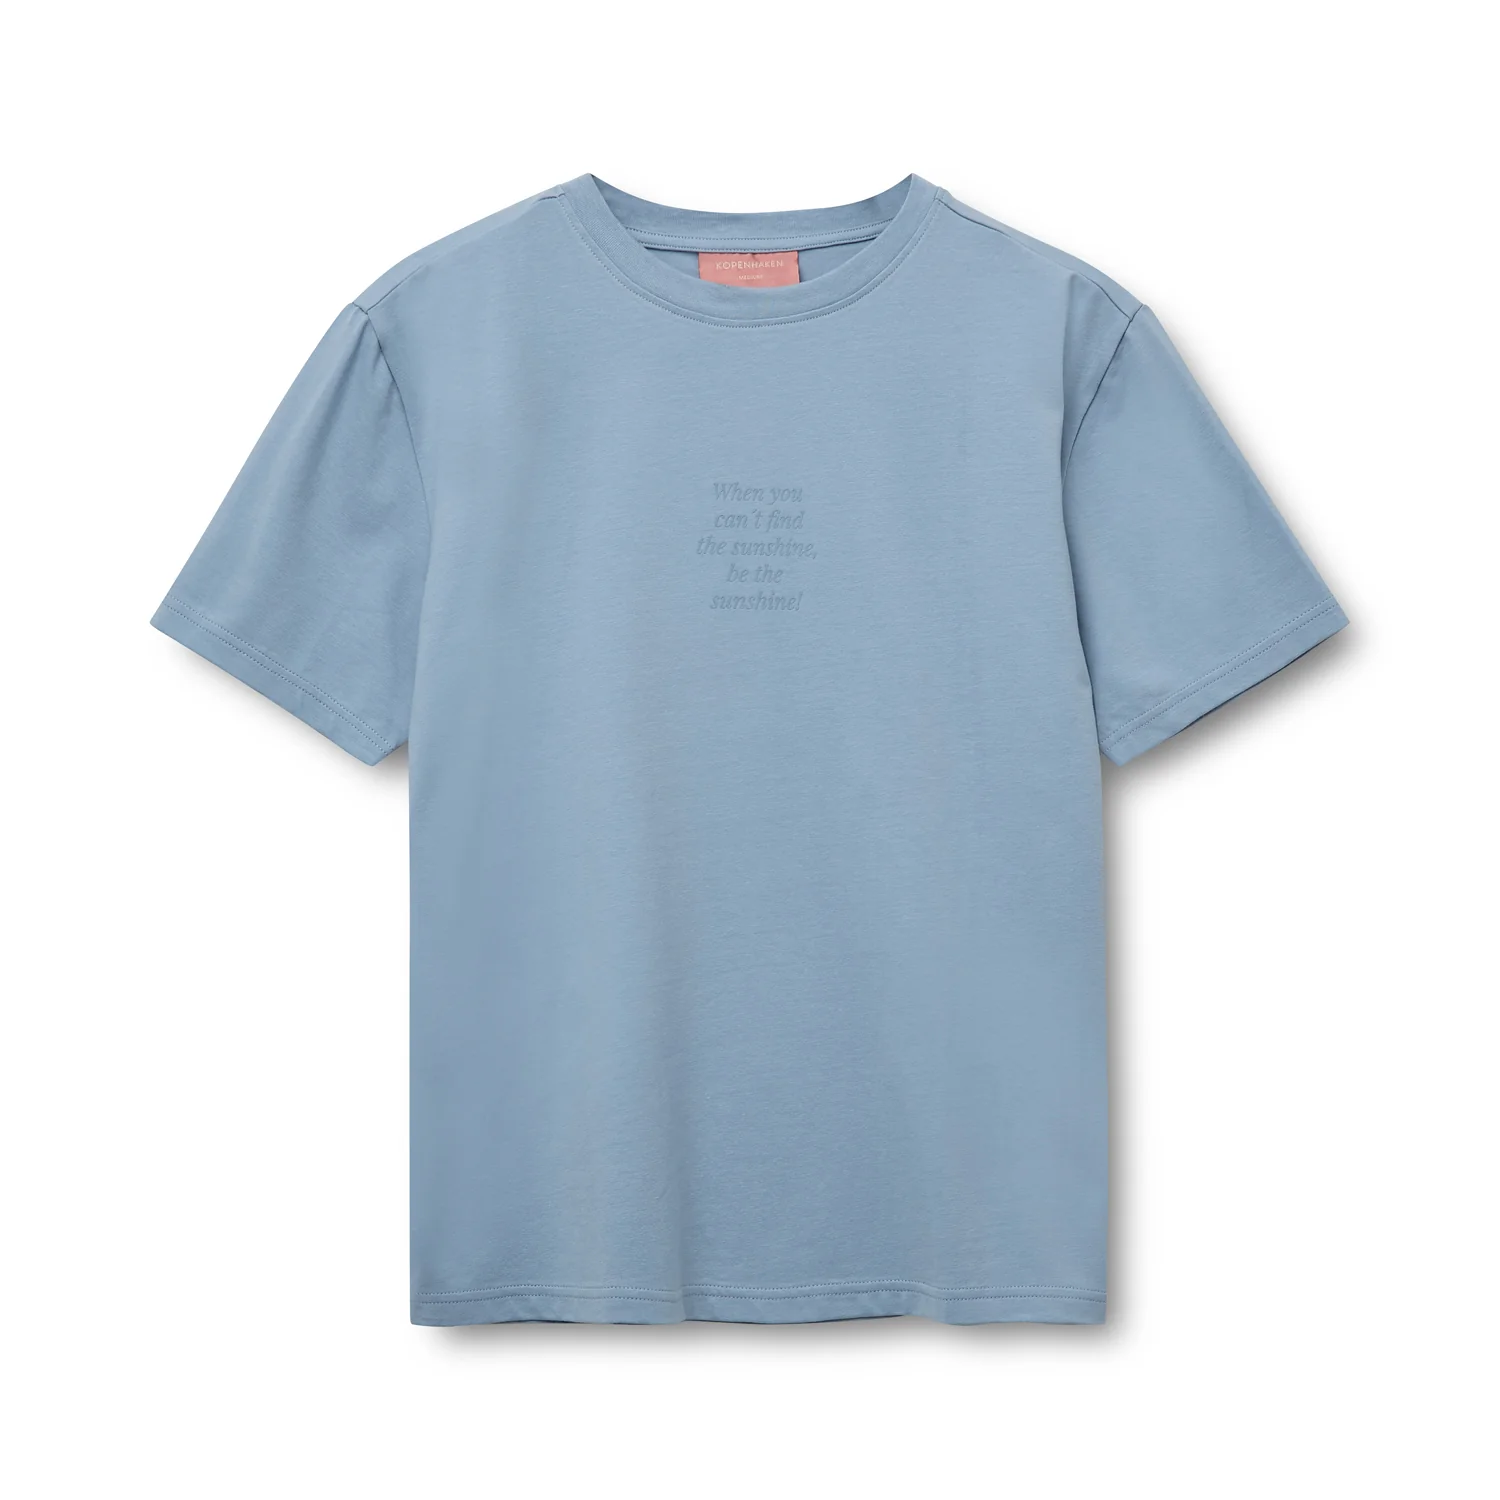
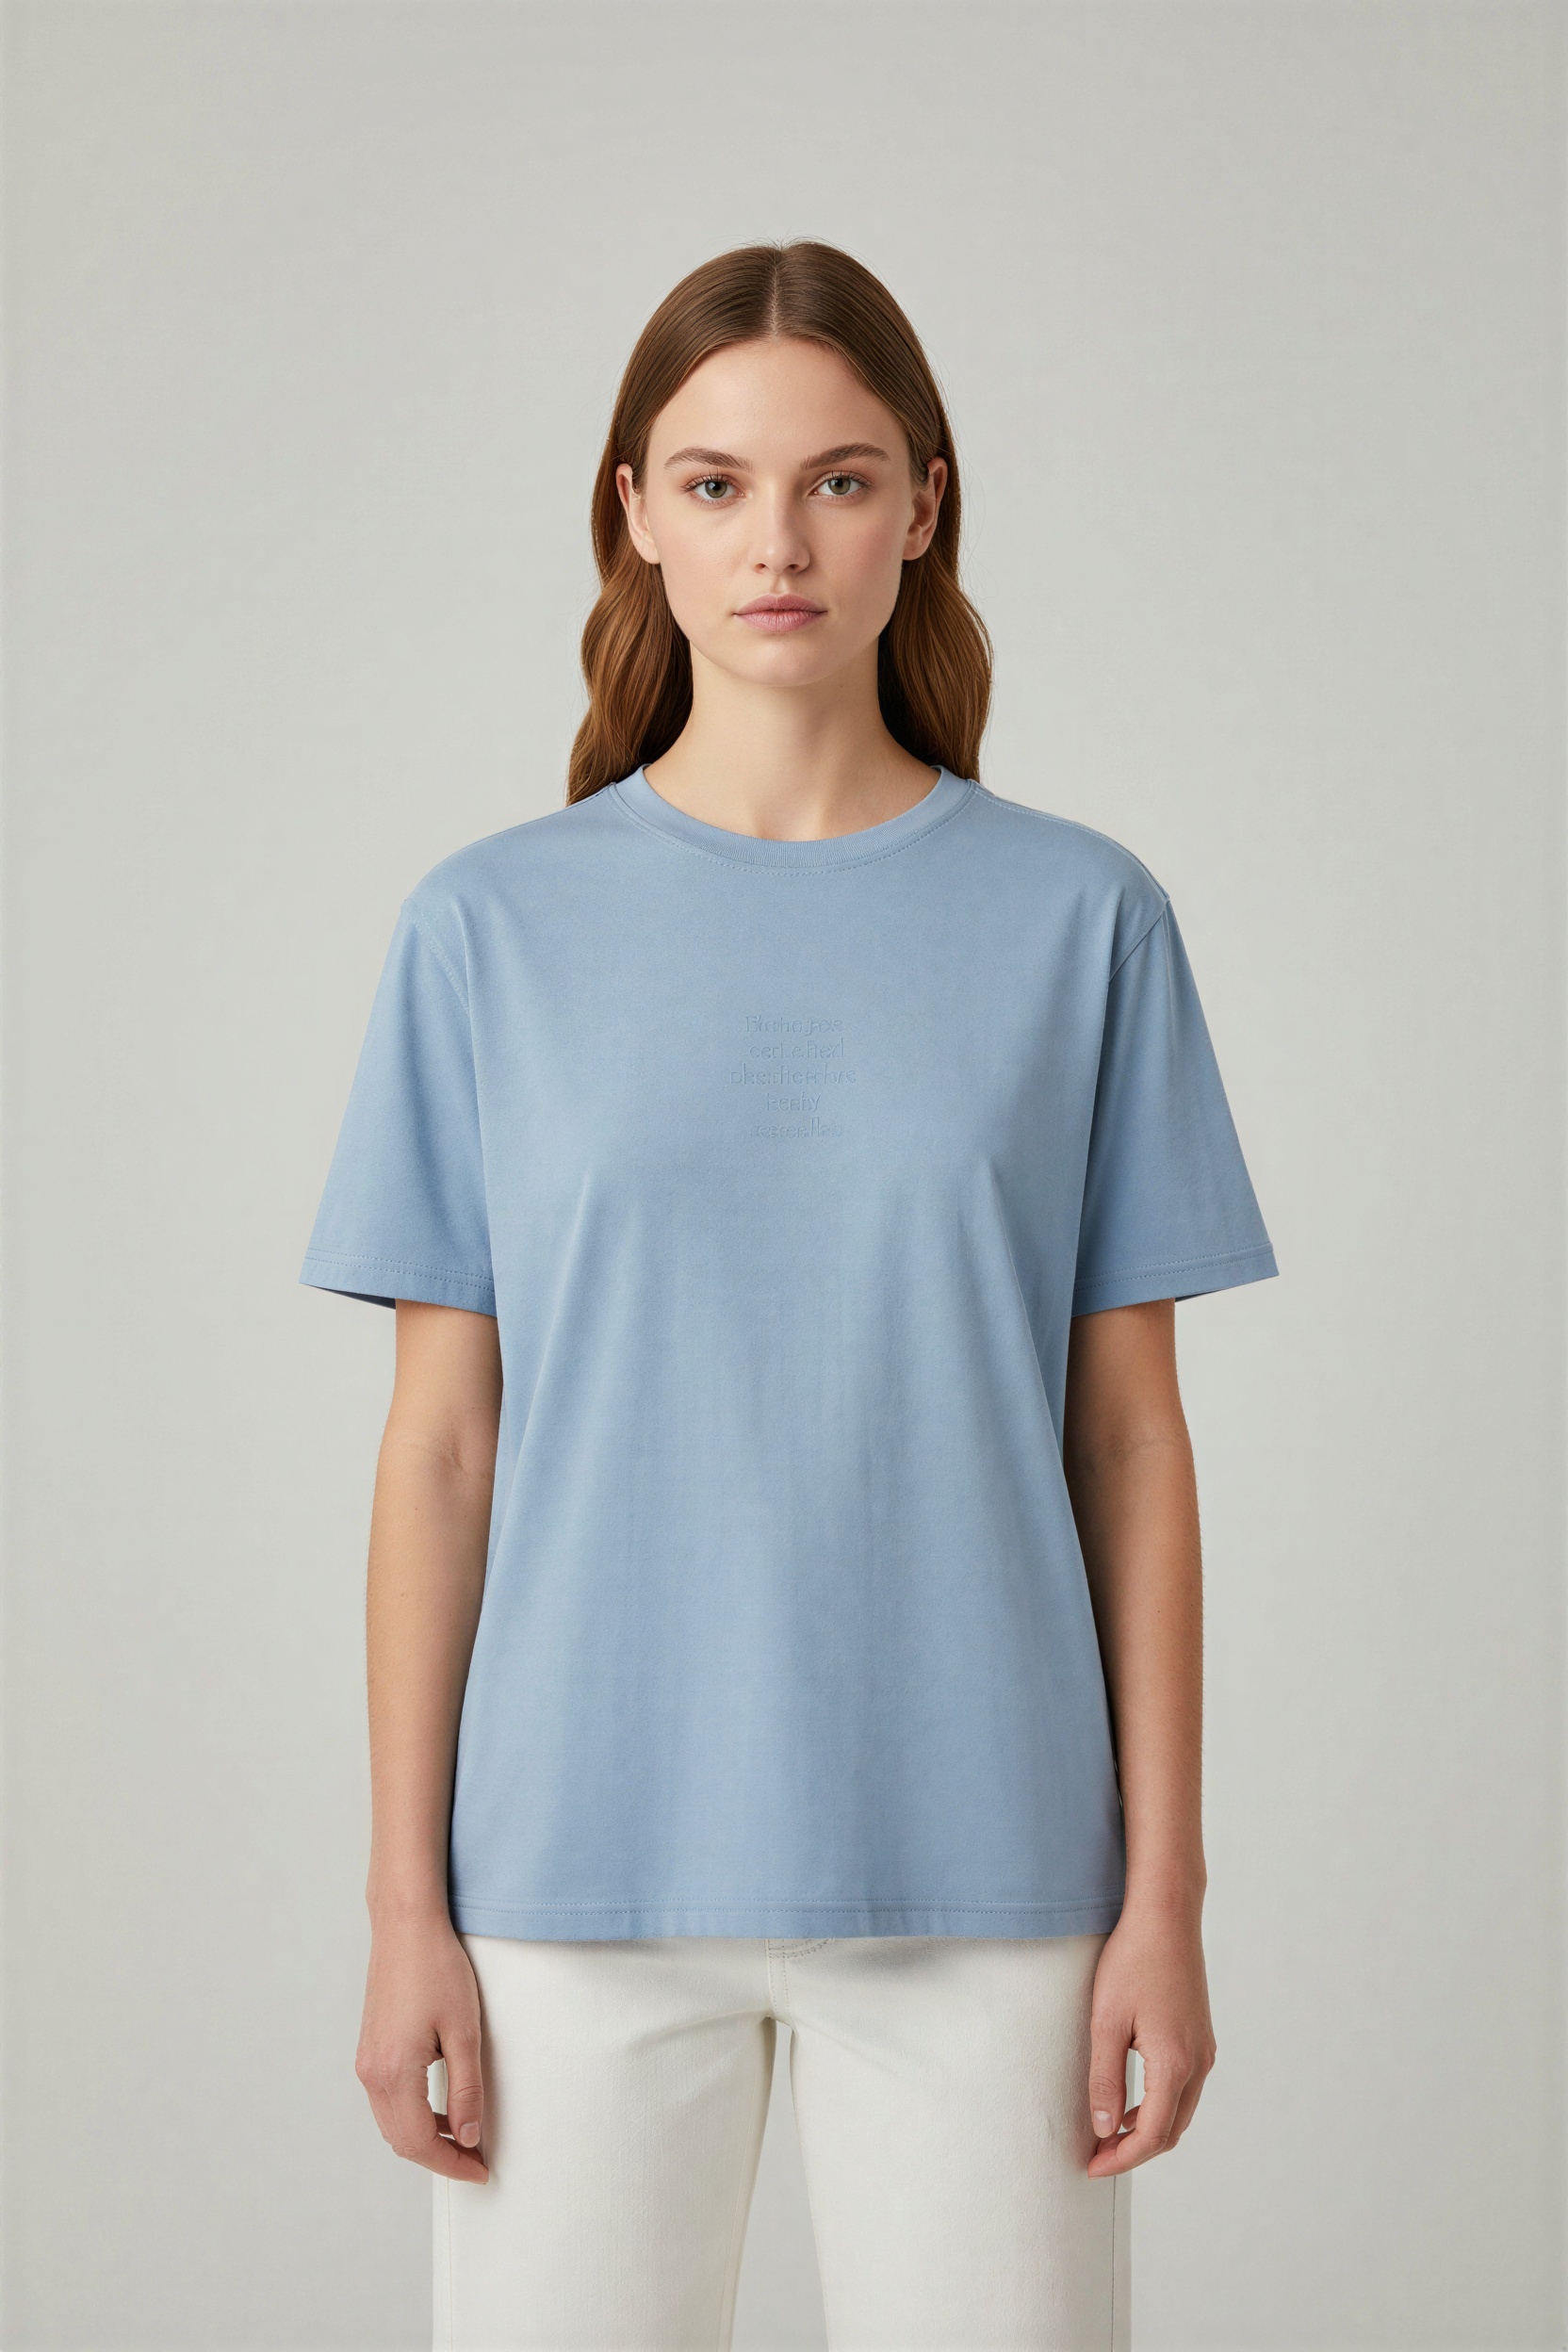
Generated
Watch a demo
A run from product pick to published image
Watch a run go from the product picker to a published image.
How it works
From packshot to published image in three steps
Pick the products and the packshot
PackScene reads the photos already sitting on your Shopify products. Click the flat lay you want used as the front, and a second one if the back of the garment is worth showing. There is nothing to upload.
Set the run
Choose a male or female model, then tick which framings you want. The picture shape is set once for the whole run. Nothing is locked in until you press Generate.
Approve, then publish
Every image lands in a review screen first. Regenerate the ones that missed and delete what you do not want. The keepers go to the product media in one click.
The longer walkthrough, with the failure cases at each step, is in how to turn packshots into AI model photos.
Real output
Four garments, packshot and generated, front and back
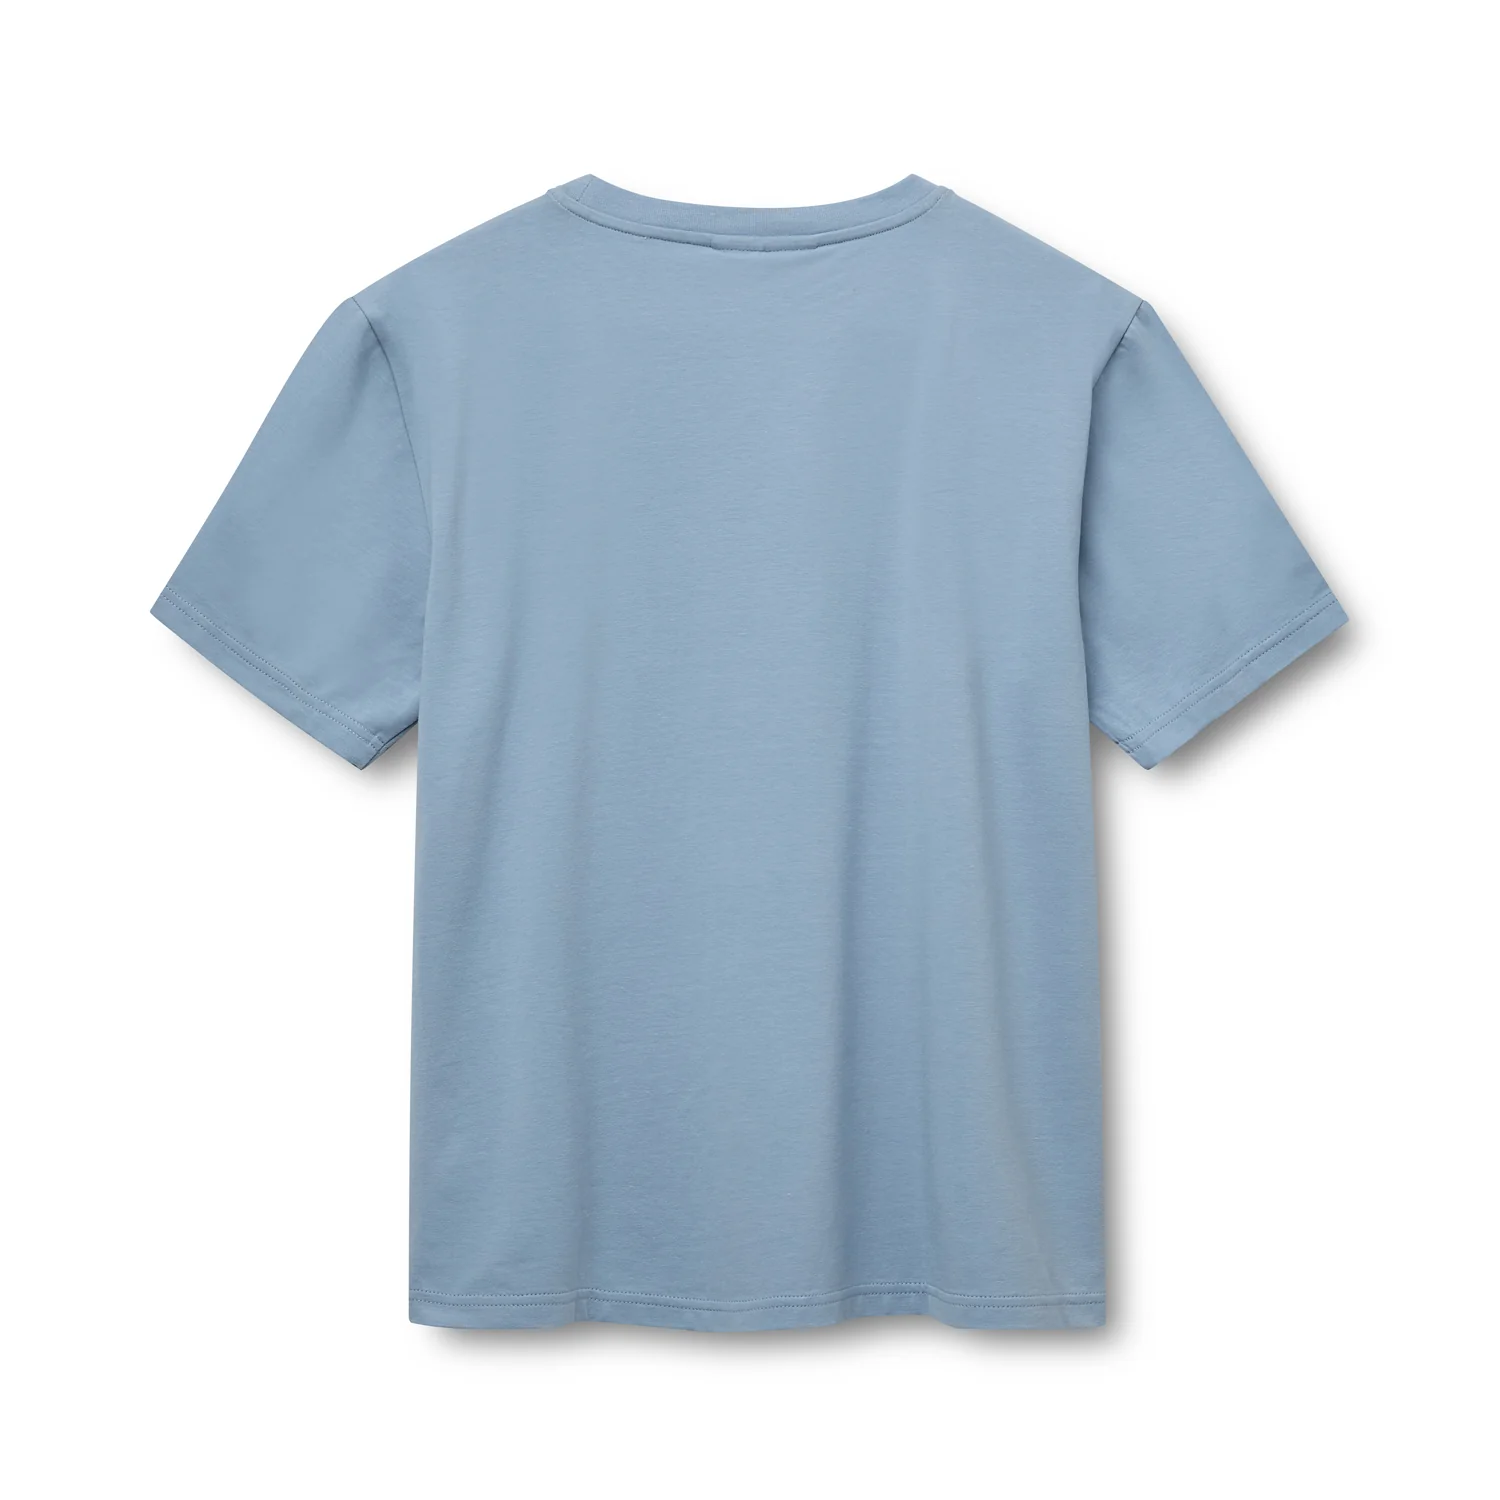
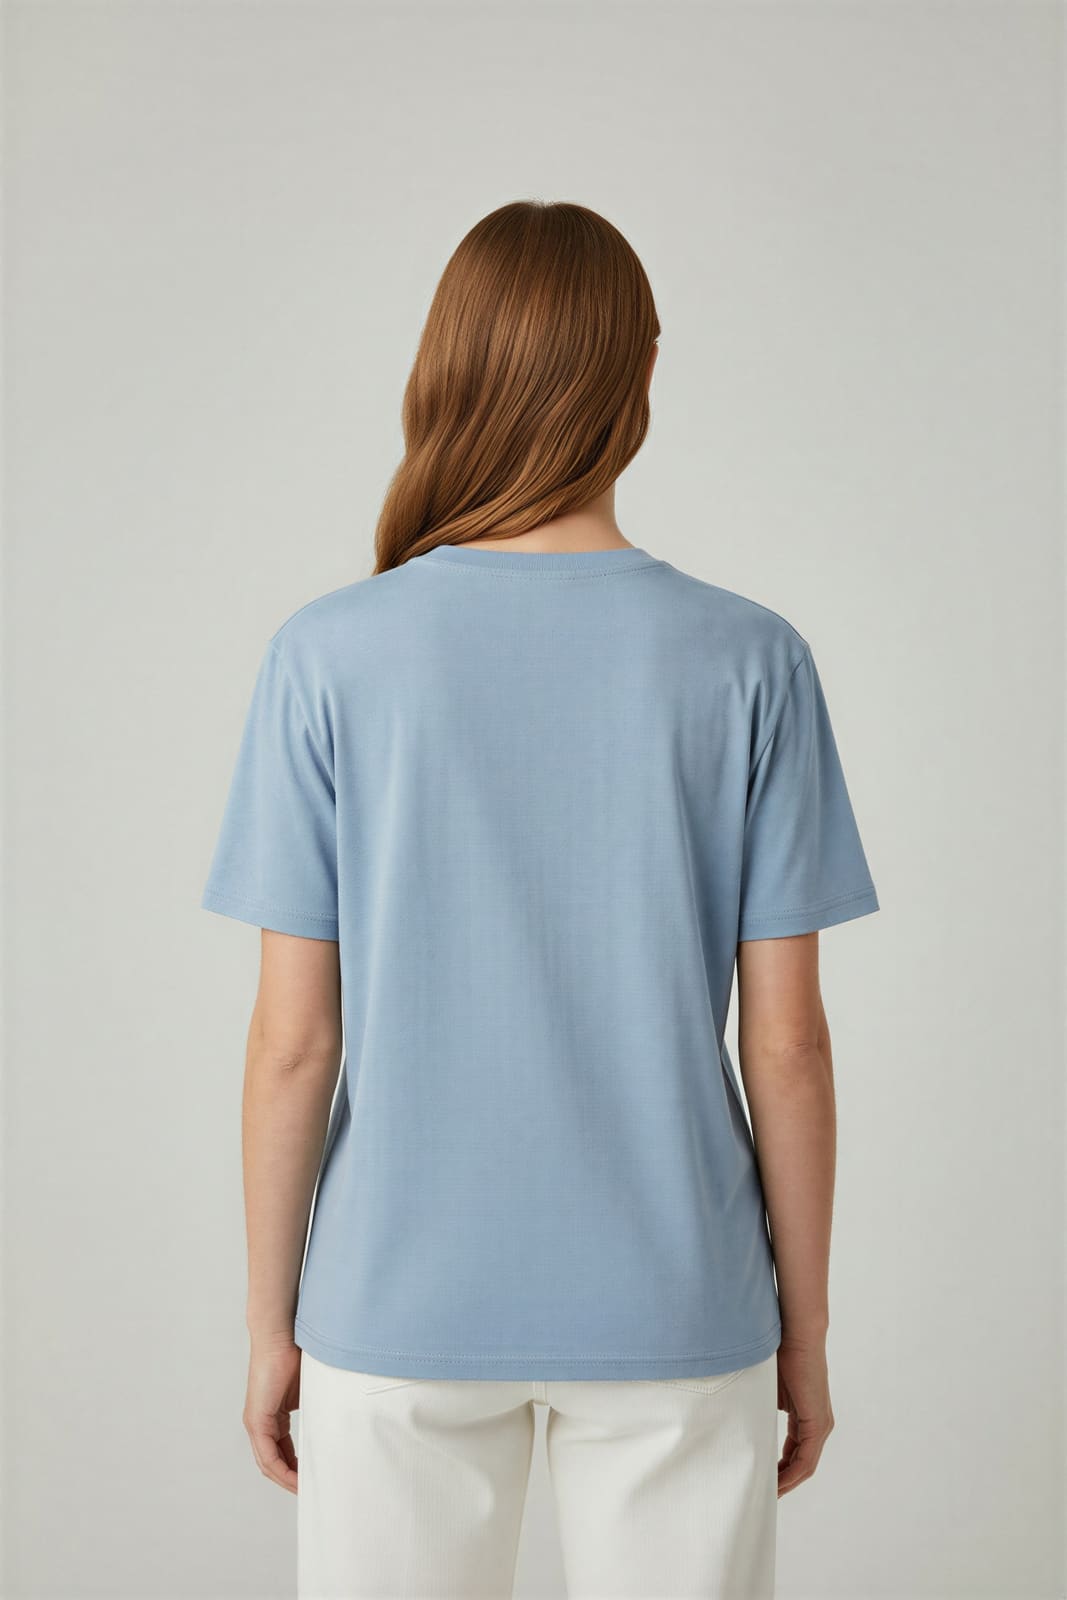
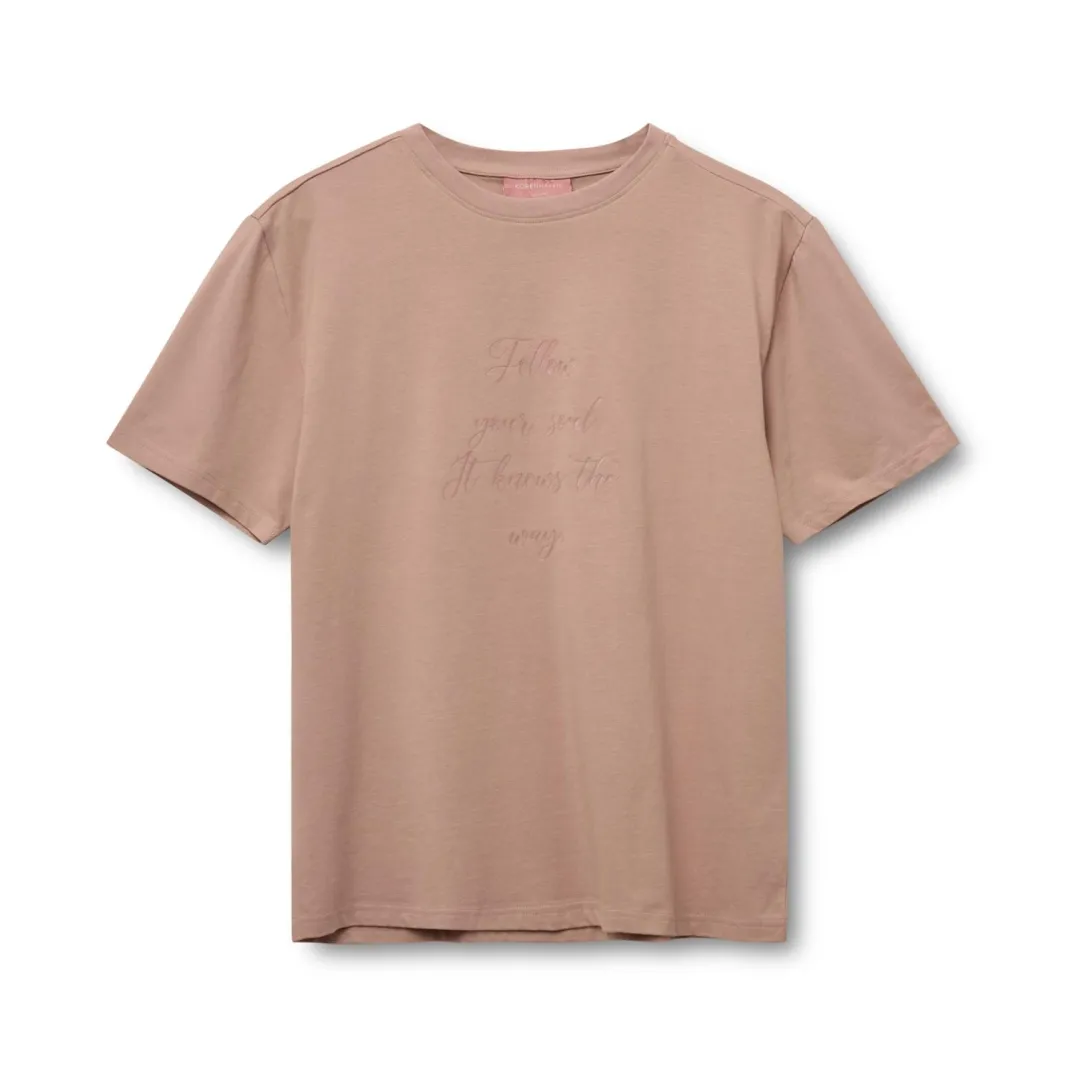
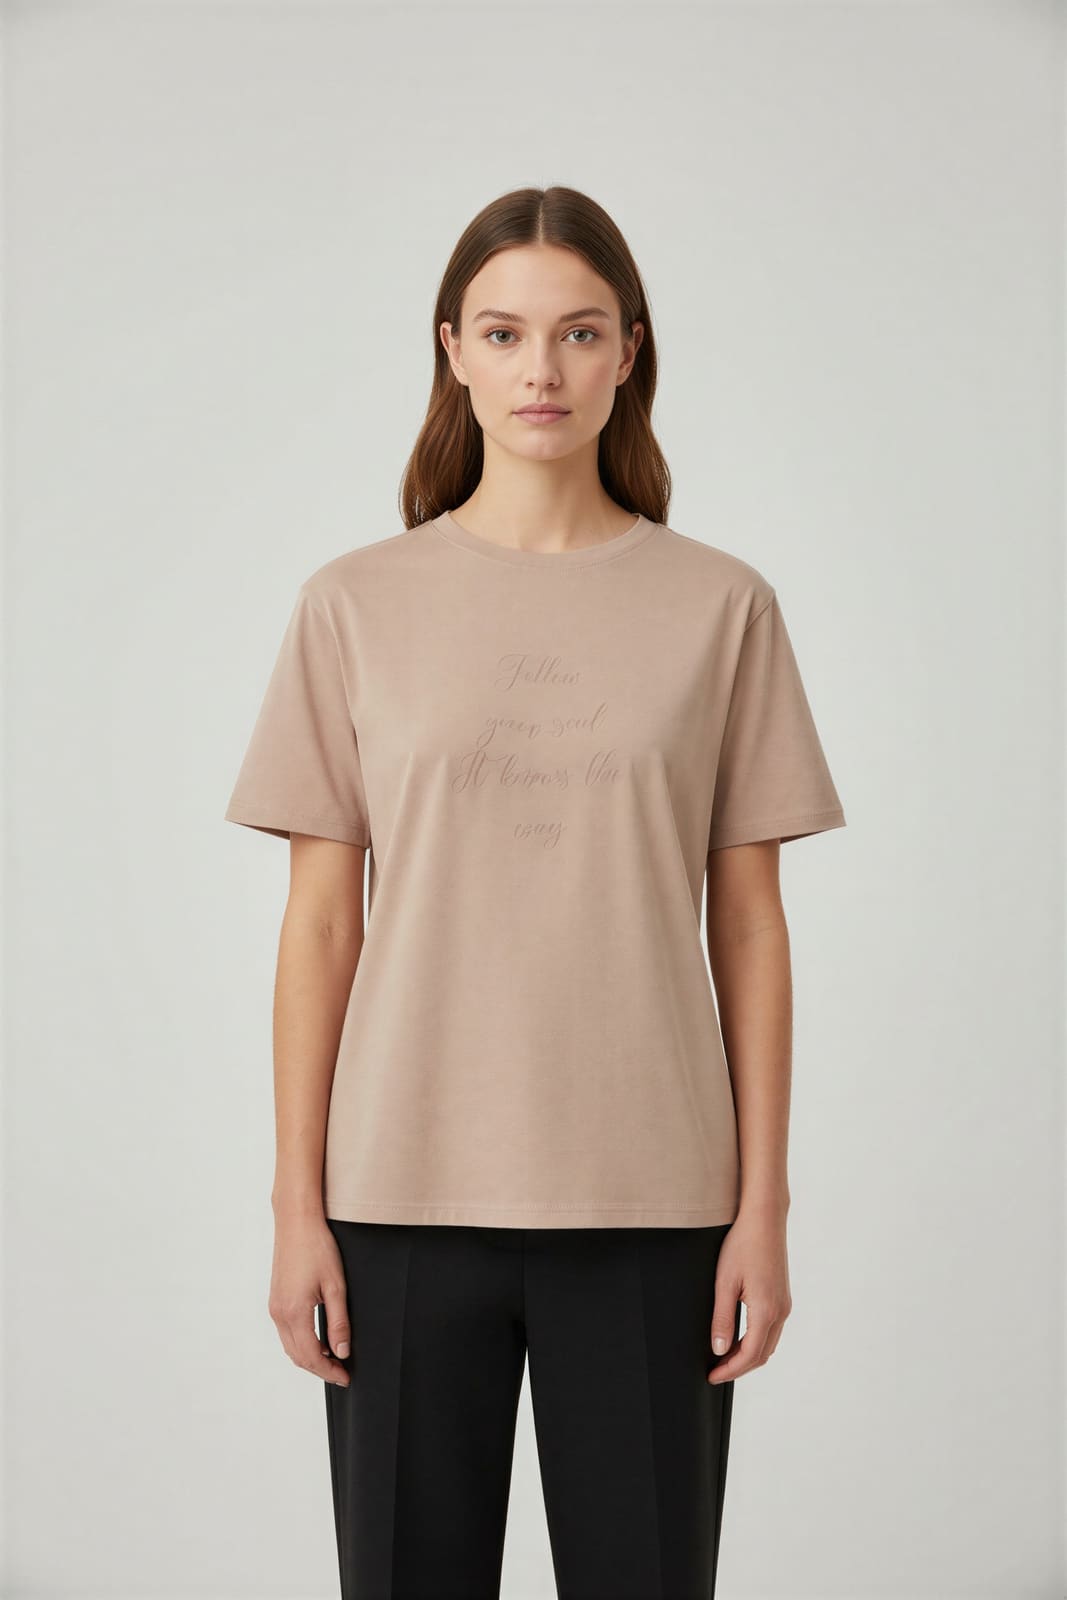
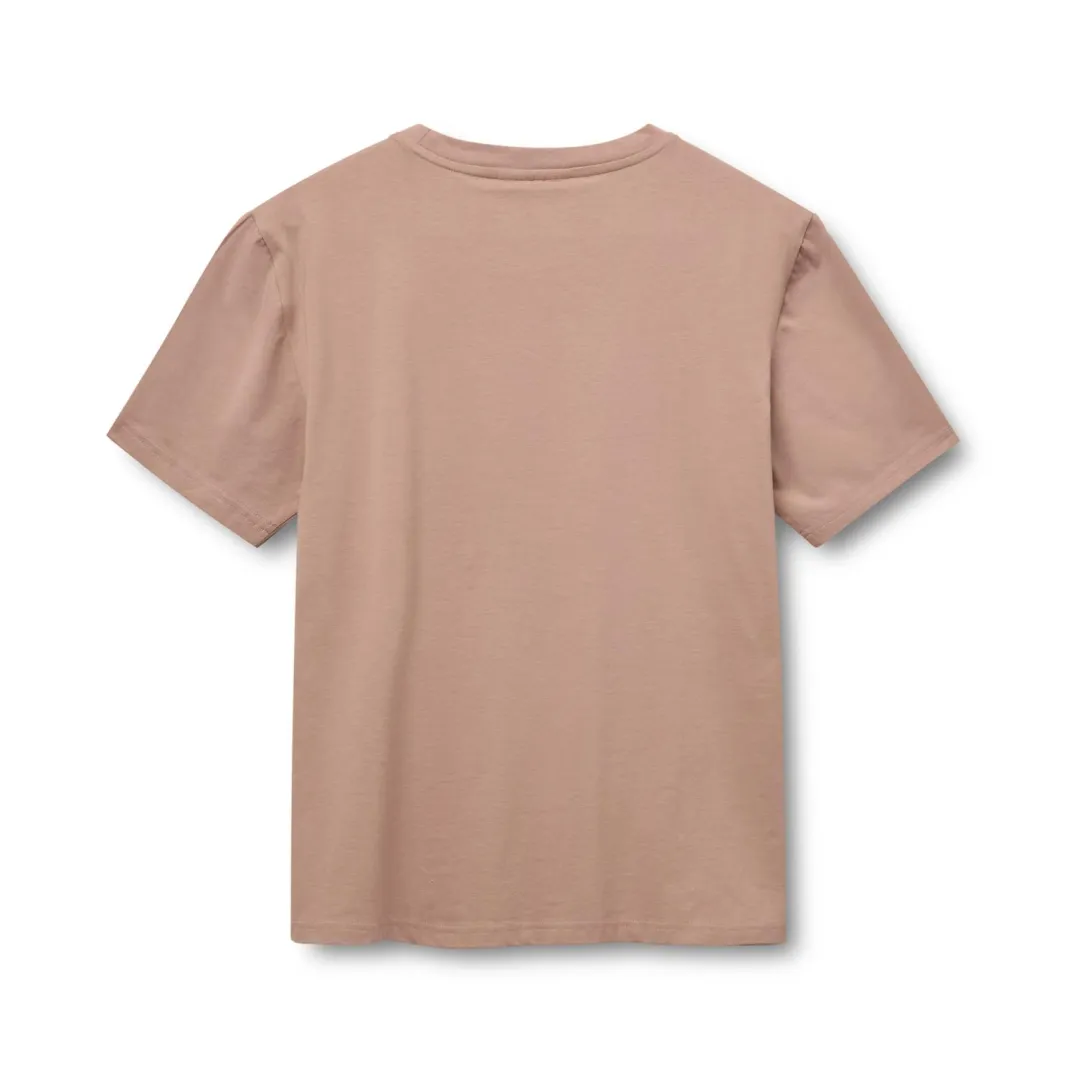
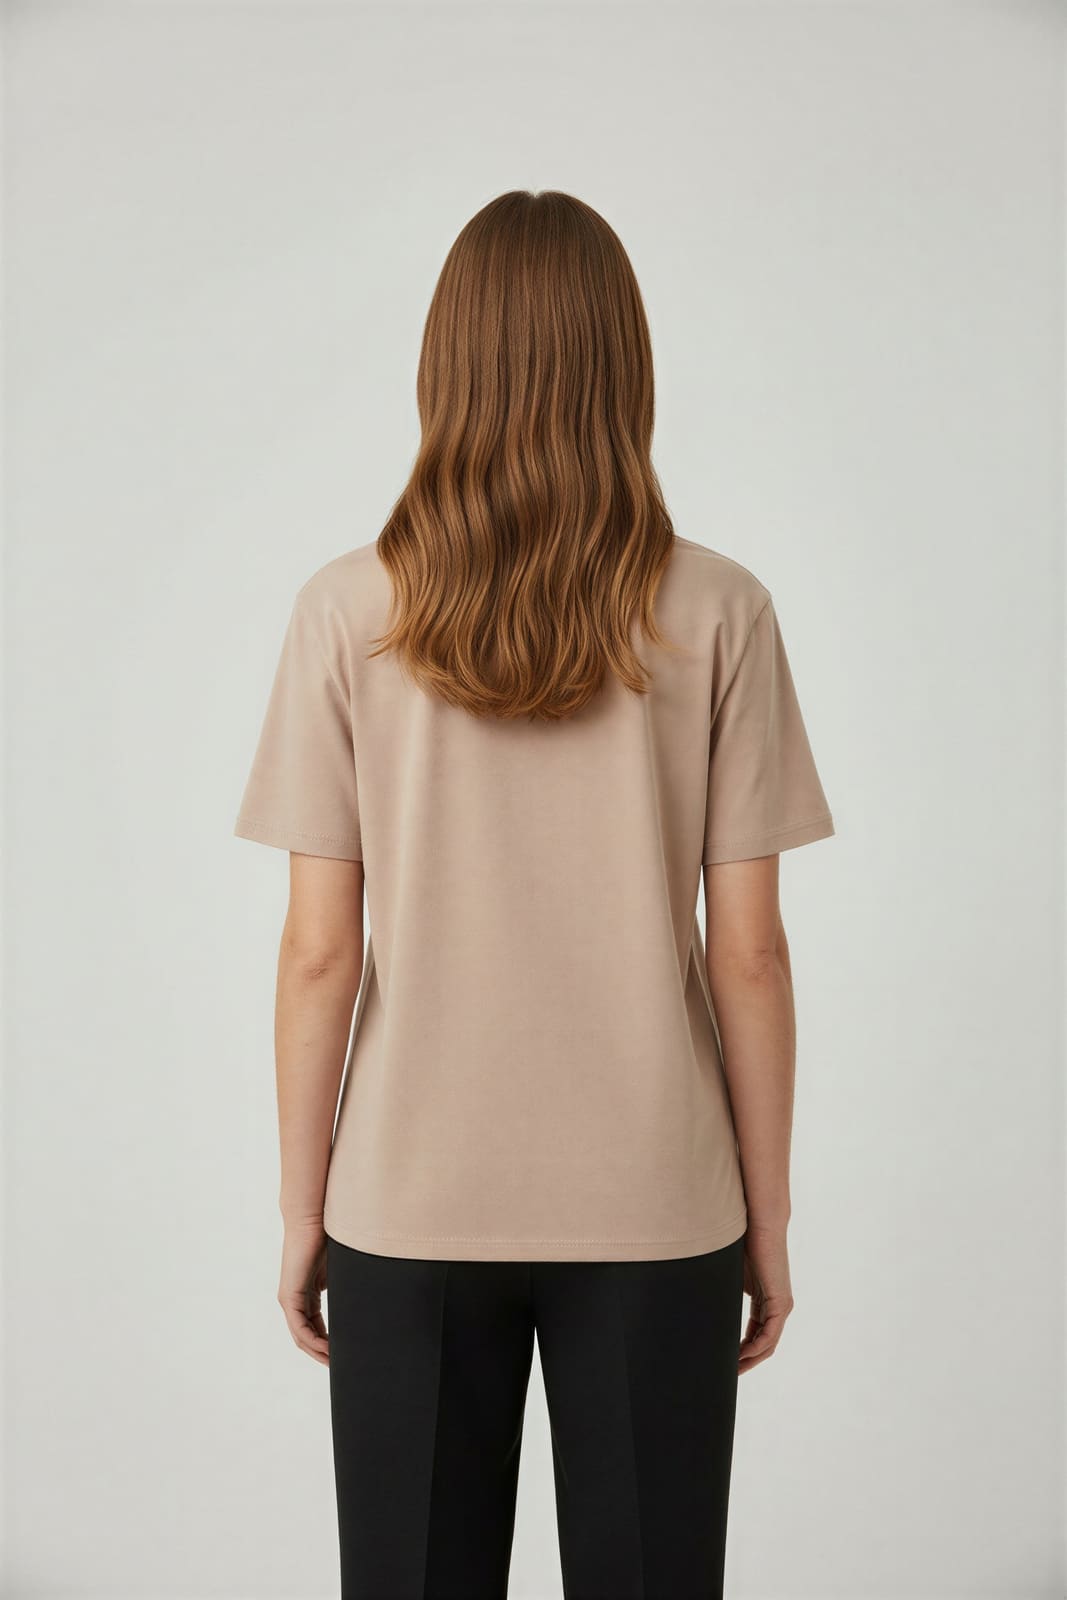
These are unretouched PackScene results. Look closely at the tone-on-tone prints on the two tees, which soften in the generated version. Judge output at full size, never as thumbnails.
Packshot front
Generated front
Packshot back
Generated back
Light blue cotton tee with a tone-on-tone print
Two credits: one front, one back.
Packshot front
Generated front
Packshot back
Generated back
Dusty rose tee with a script print
Two credits: one front, one back.
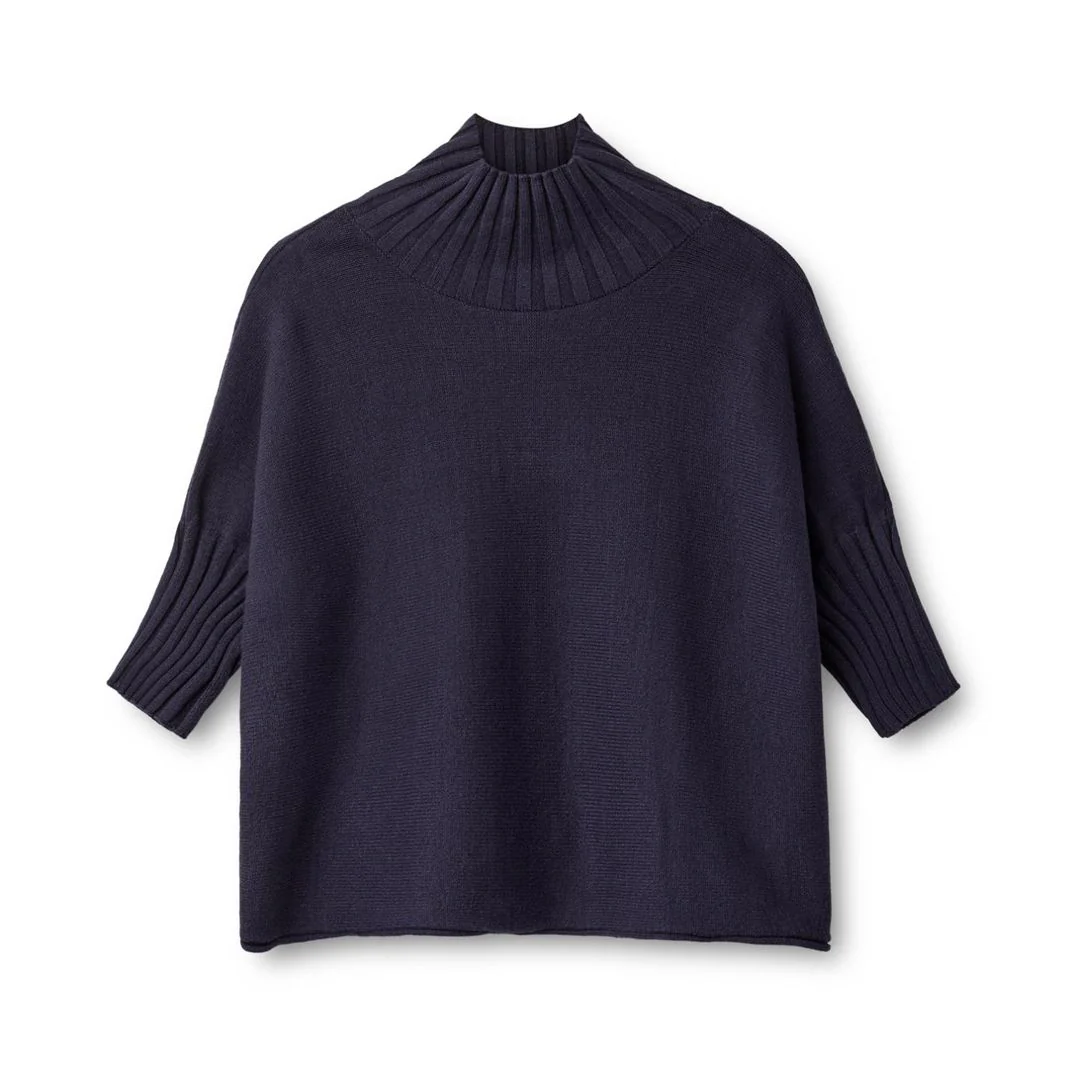
Packshot front
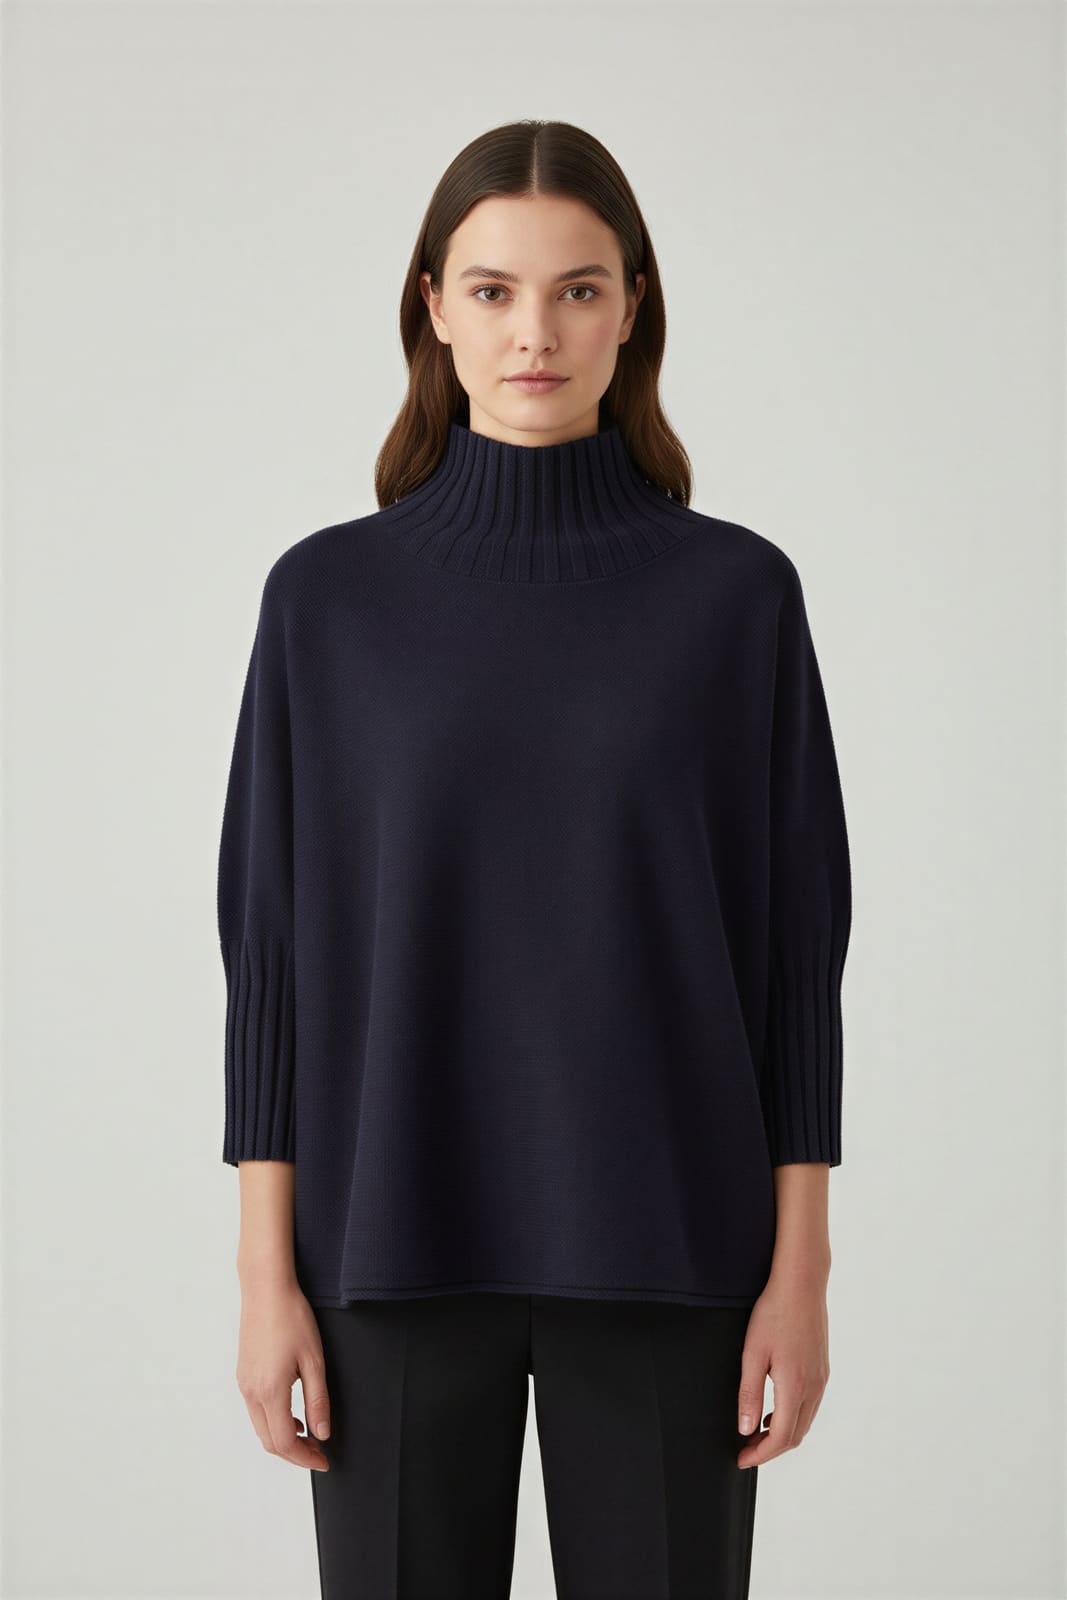
Generated front
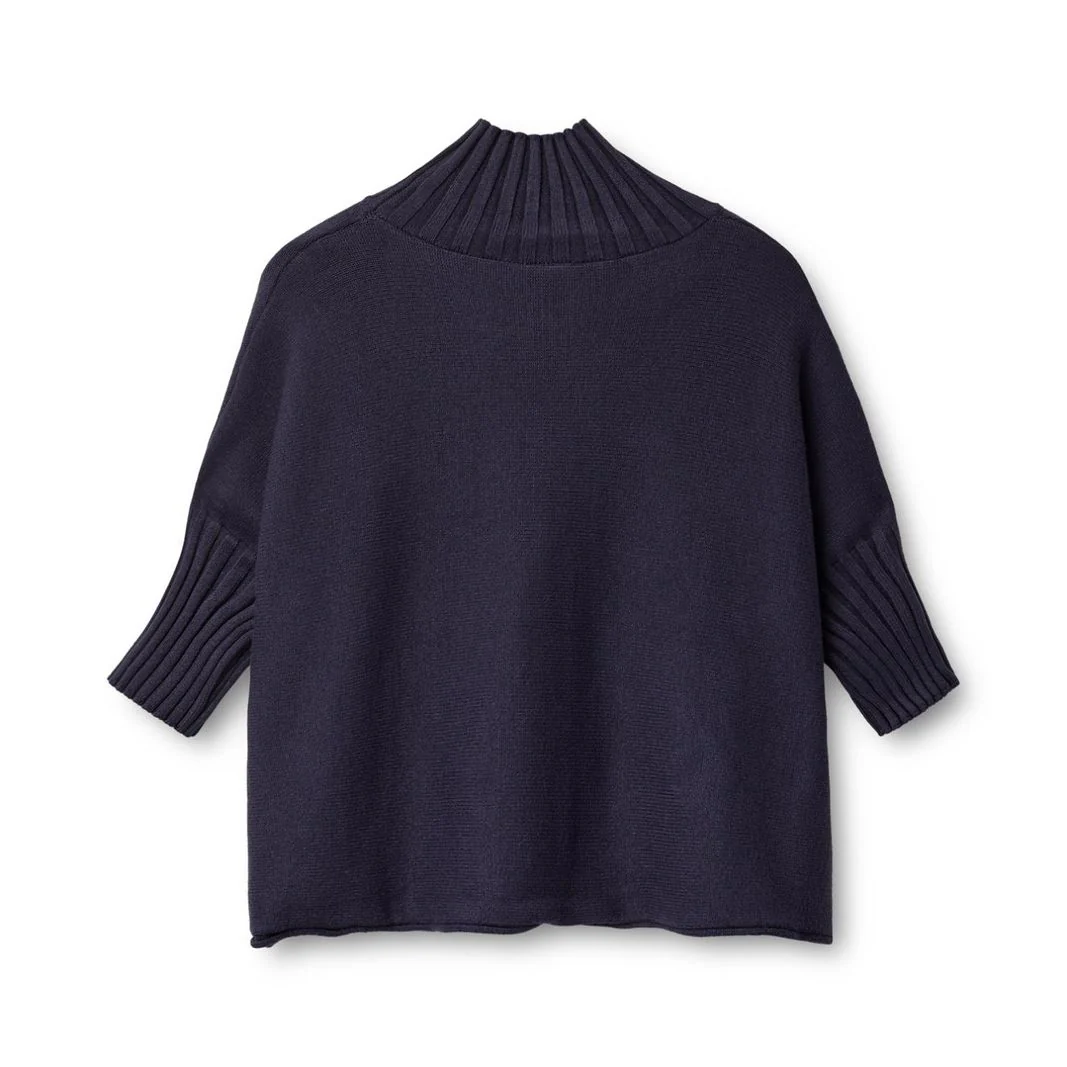
Packshot back
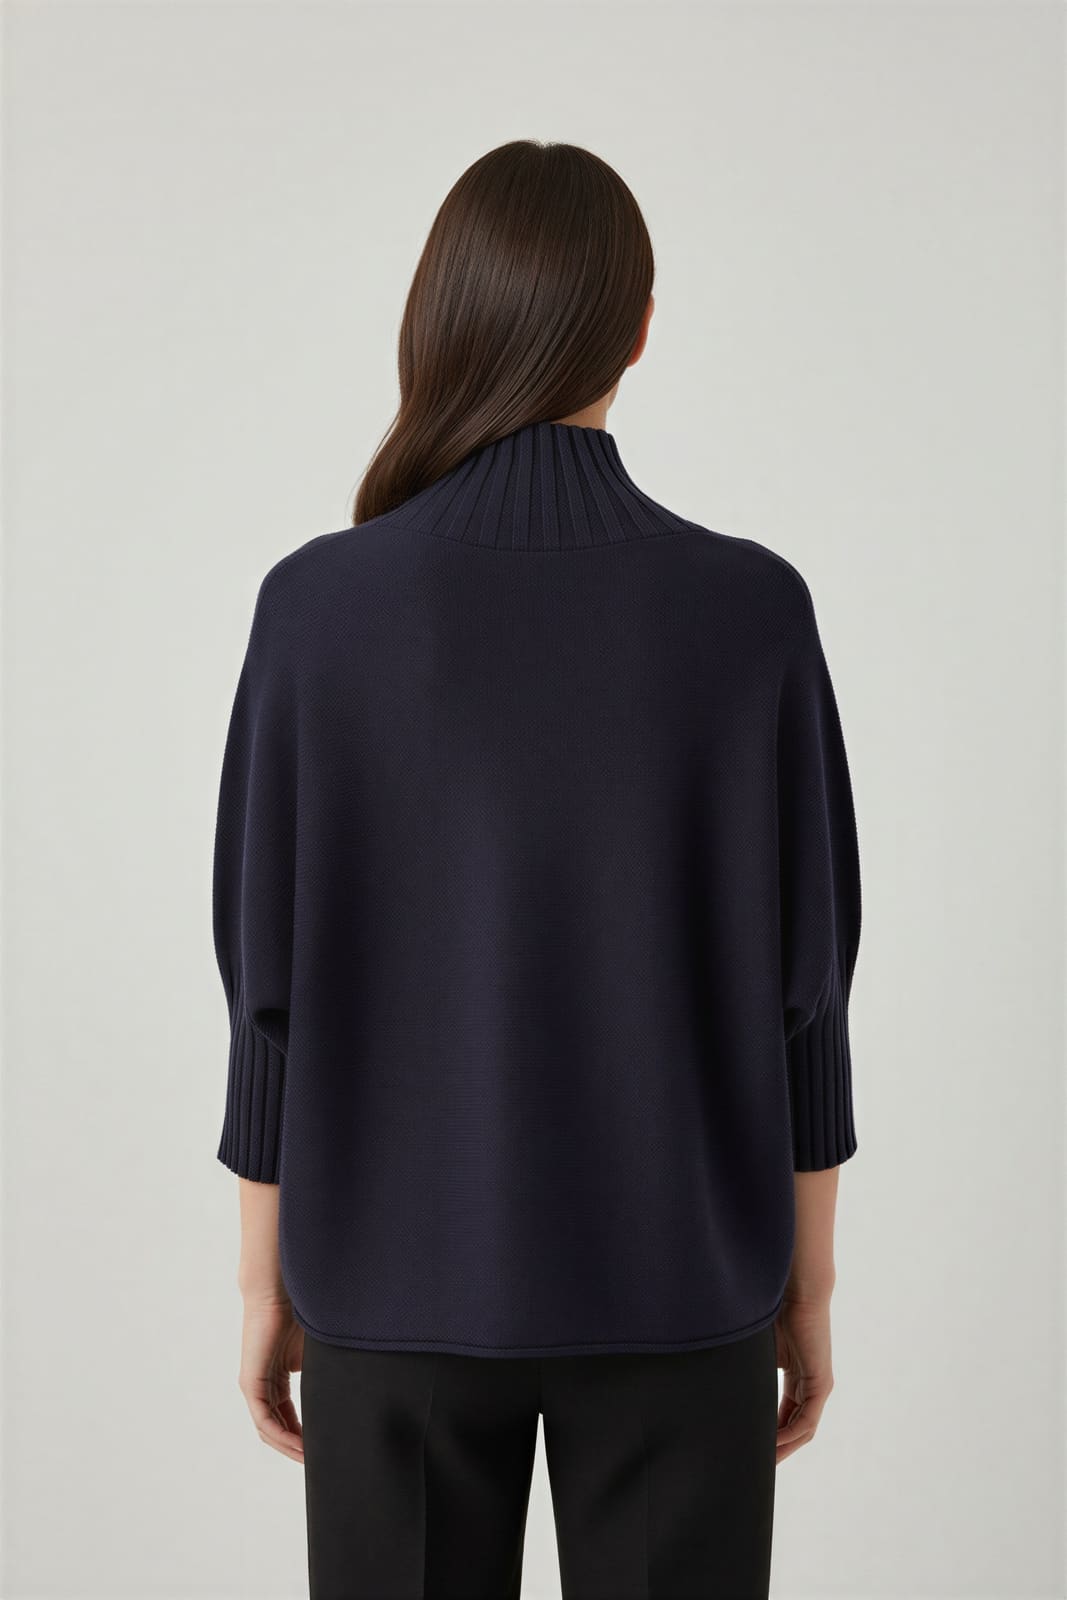
Generated back
Navy mock-neck knit
Two credits: one front, one back.
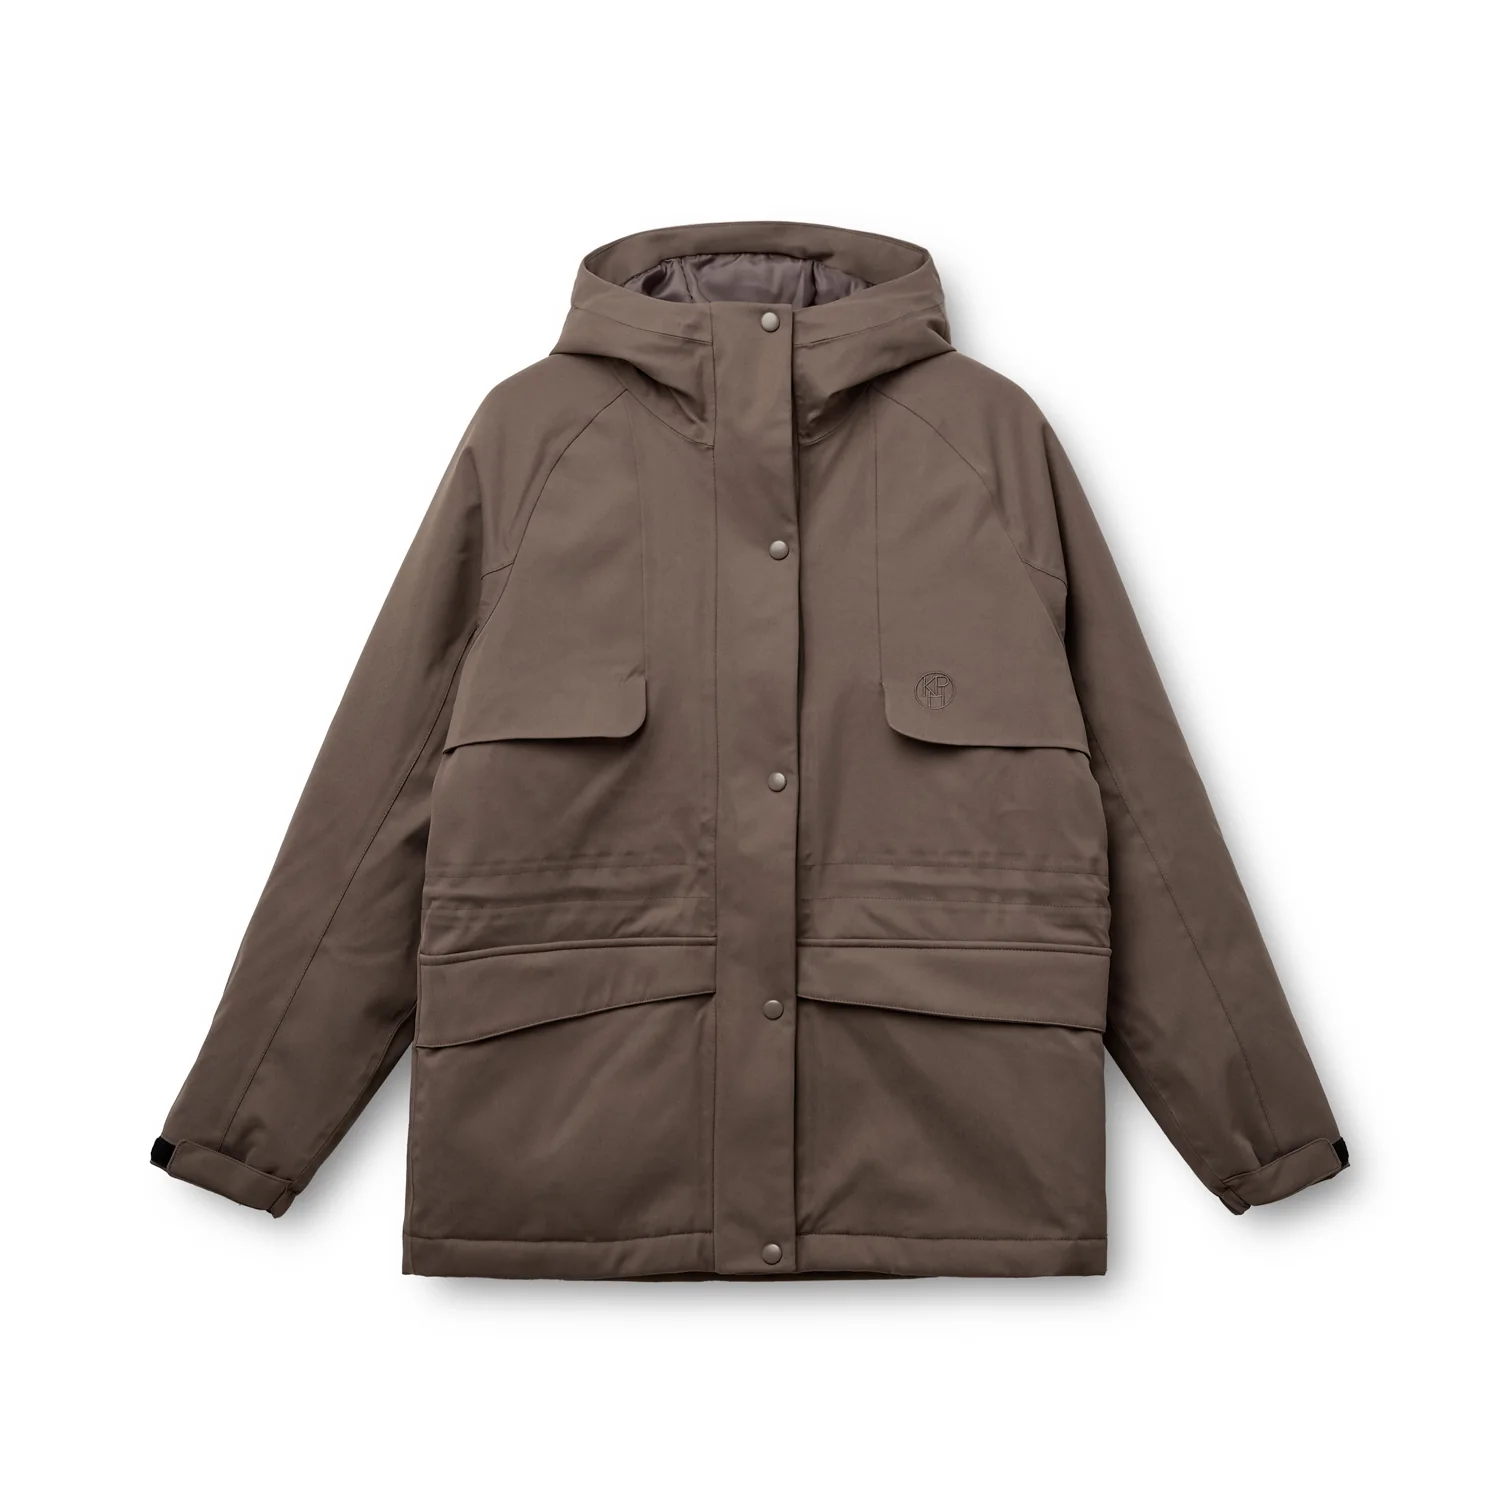
Packshot front
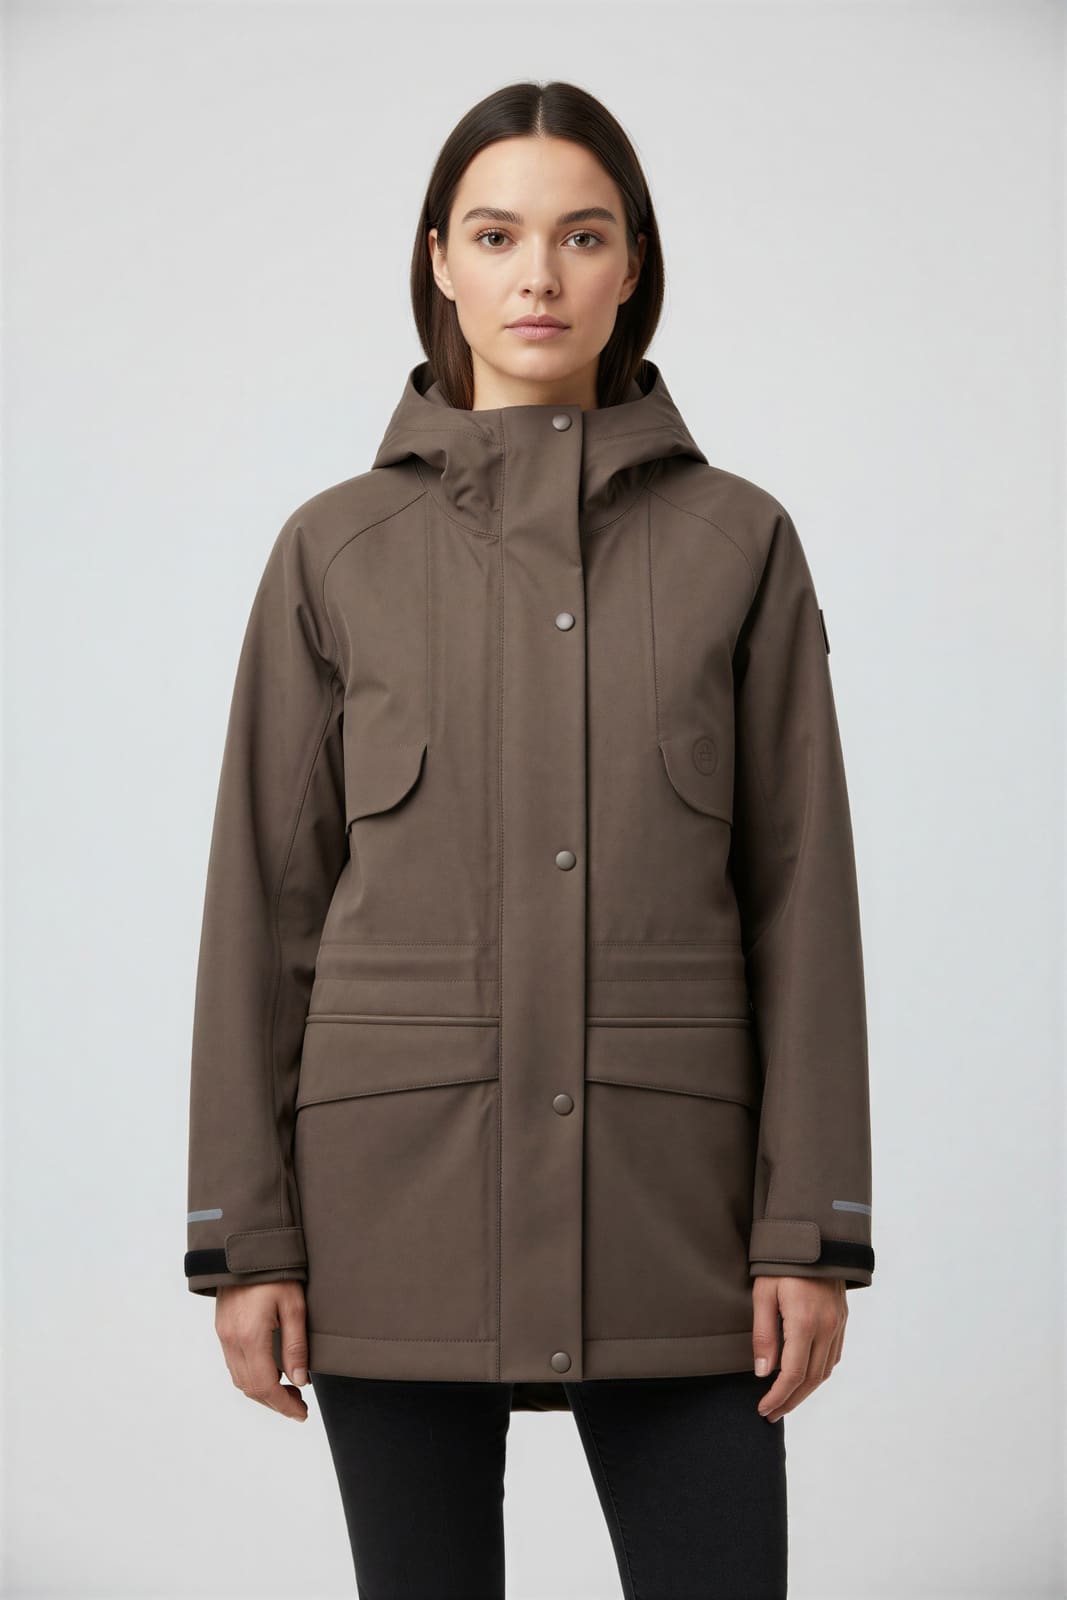
Generated front
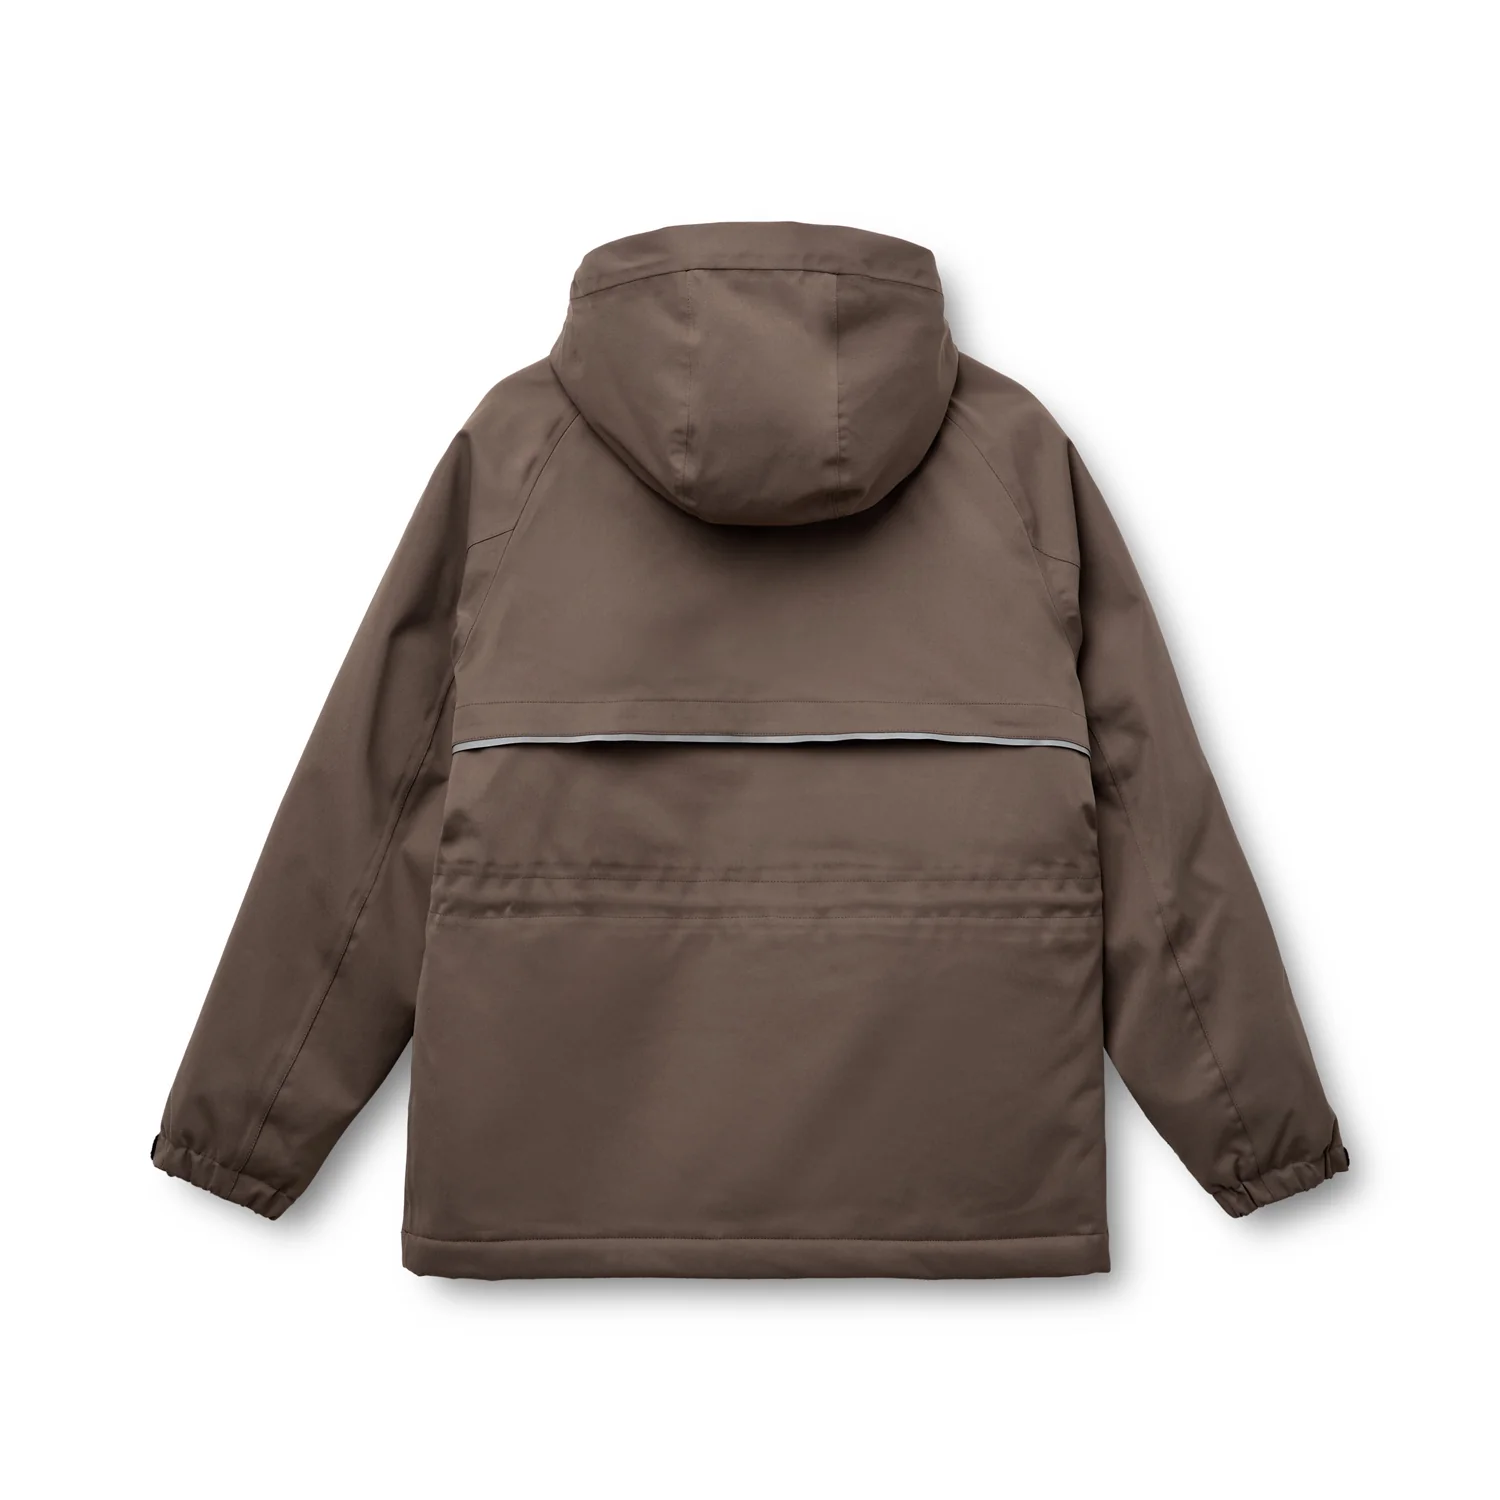
Packshot back
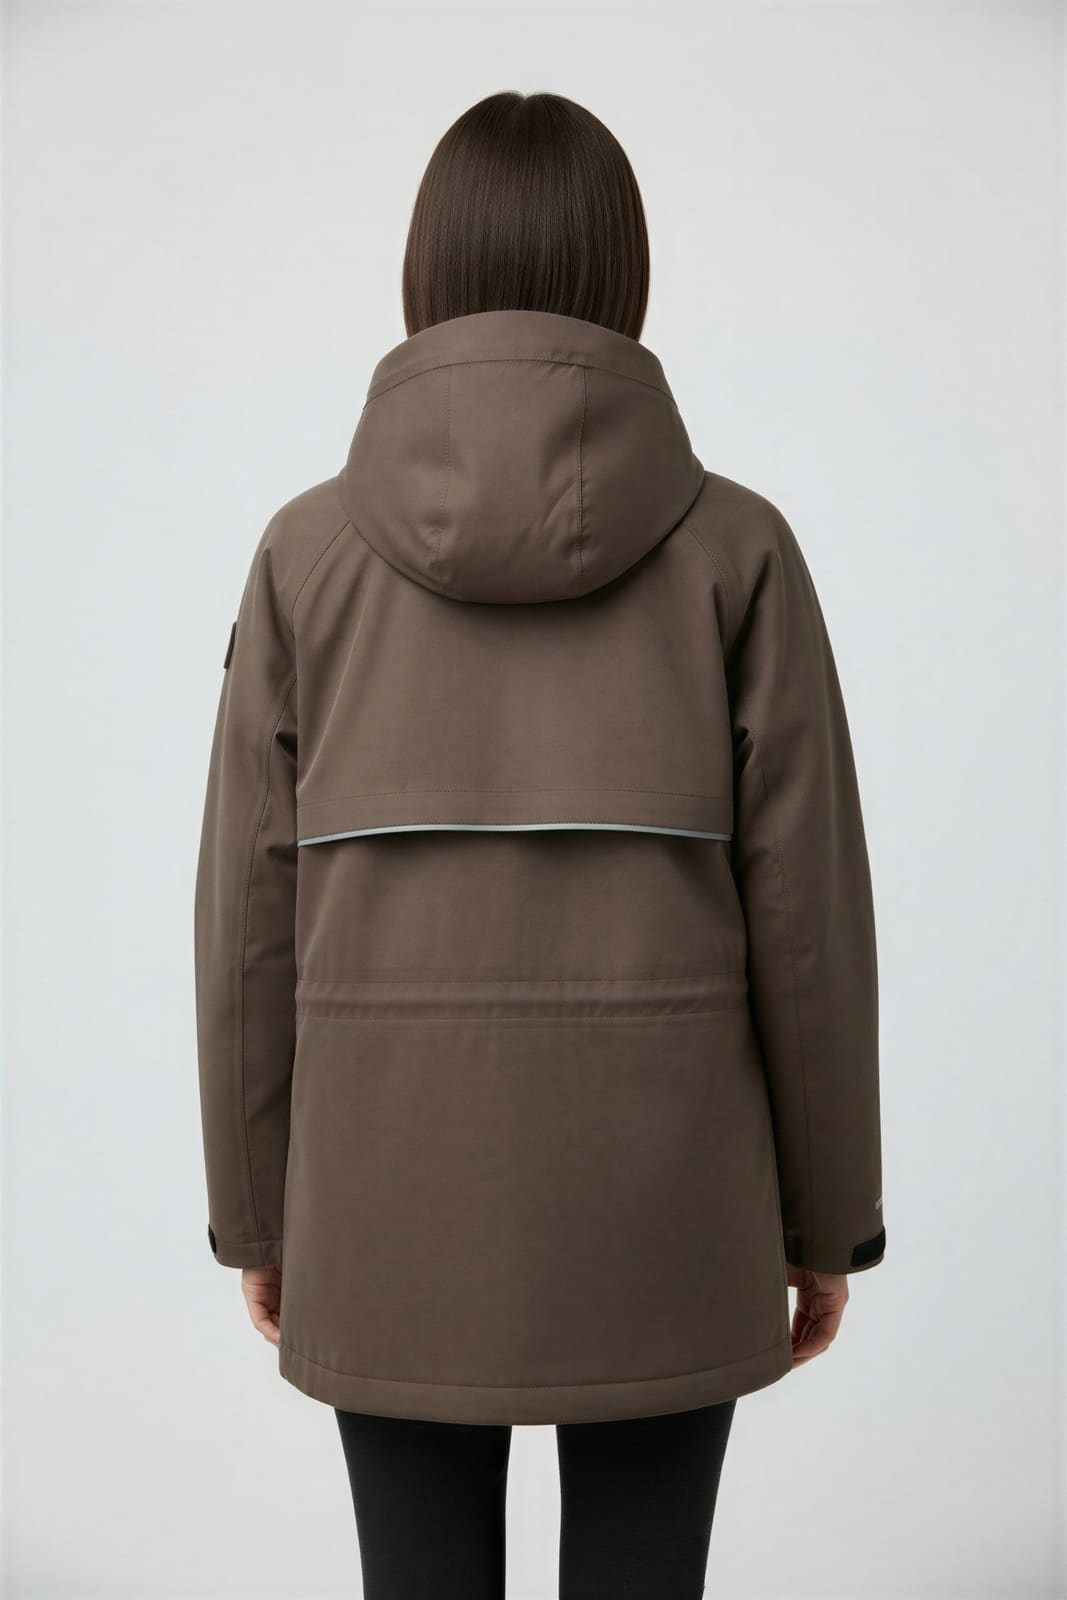
Generated back
Hooded parka in taupe
Two credits: one front, one back.
Fit
What PackScene is good at, and what it is not
An on-model generator can only place a product on a body, so your catalogue decides most of the answer before the app does. Here is the sorting, as plainly as we can put it.
Works well
- T-shirts, hoodies, knitwear, shirts and jackets
- Dresses, jumpsuits, coats, trousers and skirts
- Swimwear, activewear and sleepwear
- Accessories that are worn on the body
Check before you commit a season
- Fine knits and lace lose their structure and come back smoothed out
- Placement prints and logos drift off centre
- Colour-critical ranges shift a shade, which matters if you sell six near-identical navies
- Structured pieces shot flat can come back slimmer than the real garment
Wrong app
- Furniture, kitchenware, tools and electronics
- Anything with no body to be placed on
- Packshots that are crops, screenshots or under roughly 512 pixels a side
- Shoots that need a named model or a branded location
The garment-by-garment version, including which framing suits which piece, is in AI product photos for apparel and clothing brands. If you are new to the category, what AI product photography is and what to disclose covers the ground rules.
Before you press Generate
The choices you actually make
Five settings, and that is the whole setup screen. The background is fixed rather than chosen. That is deliberate, because one grey studio across every image is what makes a collection look like it was shot in a day.
- A male or female model
- Full body, upper body or lower body framing, and you can tick more than one
- Square, 3:4 or 2:3 picture shape, chosen once for the run
- The same clean grey studio background on every image
- All of it free to change right up until you press Generate
Front and back
The back view, when the back is worth showing
The back is generated from the finished front image, so the model and the styling carry across the pair. It only knows what you show it. A print or a vent on the reverse needs its own back packshot.
- Choose a back packshot and you get a matching back view
- The back is drawn from the finished front image, so the model and styling carry across the pair
- A vent, an open back or a print on the reverse only shows up if you give it a back packshot
- Plain-backed tees do not need one, and skipping it saves a credit
- Front plus back costs two credits
Whole drops
Queue the collection, not the product
Model identity holds inside a single run and does not carry across separate ones. Build a collection product by product over a week and it comes back as a grid of different people wearing your clothes. Queue the same thirty pieces together and they share a face, a background and a light.
- Queue a whole drop as one run instead of going product by product
- Combine full body, upper body and lower body in the same run
- Watch each product finish as the run goes
- Review the whole run in one grid when it lands
- Failed generations go back to your credit balance on their own
Finding products
Filters that match how catalogues are actually organised
Eight filters and six sort keys, all running against the Shopify API rather than in the browser. A long catalogue loads a page at a time instead of all at once. Useful when the run you want is one vendor, one tag, in stock, and nothing else.
- Filter by vendor, tag, product type, SKU, stock, inventory count, image count or status
- Type to search inside the vendor, tag and product type lists
- Sort by title, created date, updated date, inventory, product type or vendor
- Filters and sorting run against the Shopify API, so the list loads a page at a time
- Pick the products for the run from the same screen
Review
Nothing reaches your storefront until you say so
Every image lands in a review screen first. Regenerations come out of their own monthly allowance rather than your image credits. Tidying up a run does not eat the budget for the next one.
- Open any image full size and step through the run with the arrow keys
- Regenerate one image without touching the rest
- Type what you want changed, like "arms crossed", and regenerate on that
- Download any image as a JPEG
- Delete the ones you do not want, and nothing reaches the storefront until you publish
Publish
Straight onto the product page
Approved images are added to the product's media in Shopify. Every image is run through an upscaler before it reaches your review screen. It arrives as a JPEG you can download from the library as well as publish.
- Send approved images to the product media in Shopify
- Choose whether they land before or after the photos already there
- Tick a box to tag published products "PackScene" so you can find them later
- Alt text and file names are written from the product title
- Your packshots stay where they are, and undoing means deleting the new image in your admin
Pricing
One credit, one finished image
Credits are spent per image, not per product, so the maths is easy to do in advance.
- Front only, one framing: 1 credit
- Front and back: 2 credits
- Each extra framing on the same garment: 1 more credit
A thirty-piece drop shot front and back lands at sixty credits. That sits inside the $39 plan with room left for redos.
Free
Four images to see whether it suits your product.
- 4 image credits, one time
- Every generation feature
- Email support
Starter
A small drop or a slow catalogue.
- 45 image credits a month
- 5 regeneration credits a month
- Around $0.20 per credit
Creator
A full collection front and back, with room for redos.
- 250 image credits a month
- 30 regeneration credits a month
- Around $0.16 per credit
Pro
Several drops a month, or a catalogue being redone.
- 700 image credits a month
- 100 regeneration credits a month
- Around $0.14 per credit
Regeneration credits are a separate allowance from image credits, and the free plan has none. The full breakdown lives in the PackScene plans and credits documentation.
FAQ
PackScene FAQ
The questions merchants ask before installing.
What kinds of products does PackScene work on?
Do I need to upload my photos?
How do credits work?
What happens when an image comes back wrong?
Can I use the images in ads and on social?
How do the images get onto my product page?
Will my whole collection look like one shoot?
Can I publish some now and the rest later?
How is this different from Botika?
Put four of your own packshots through it
Pick your two best sellers and your two most awkward pieces. Four credits is enough to tell you whether this suits your catalogue, and it costs nothing to find out.
Install on ShopifyFour free images, one time.
Related
Learn more
The full flow from picking products to publishing, with what goes wrong at each step.
Which framing suits which garment, and which pieces AI struggles with.
Price, free plan and AI video, side by side.
Nine guides covering packshots, generation, review, publishing and credits.
Where it works, where it fails, and what to disclose.