Short answer
How do you generate on-model apparel photos?
Start from your packshots
Use the flat-lay or ghost-mannequin photos you already have. PackScene reads them from your Shopify products.
If it does not work
A HEIC file straight off a phone, an SVG or an oddly saved WebP can fail outright rather than merely coming back soft, and anything under roughly 512 pixels on a side struggles. Creases you did not steam out get drawn as though you designed them.
Pick the model and framing
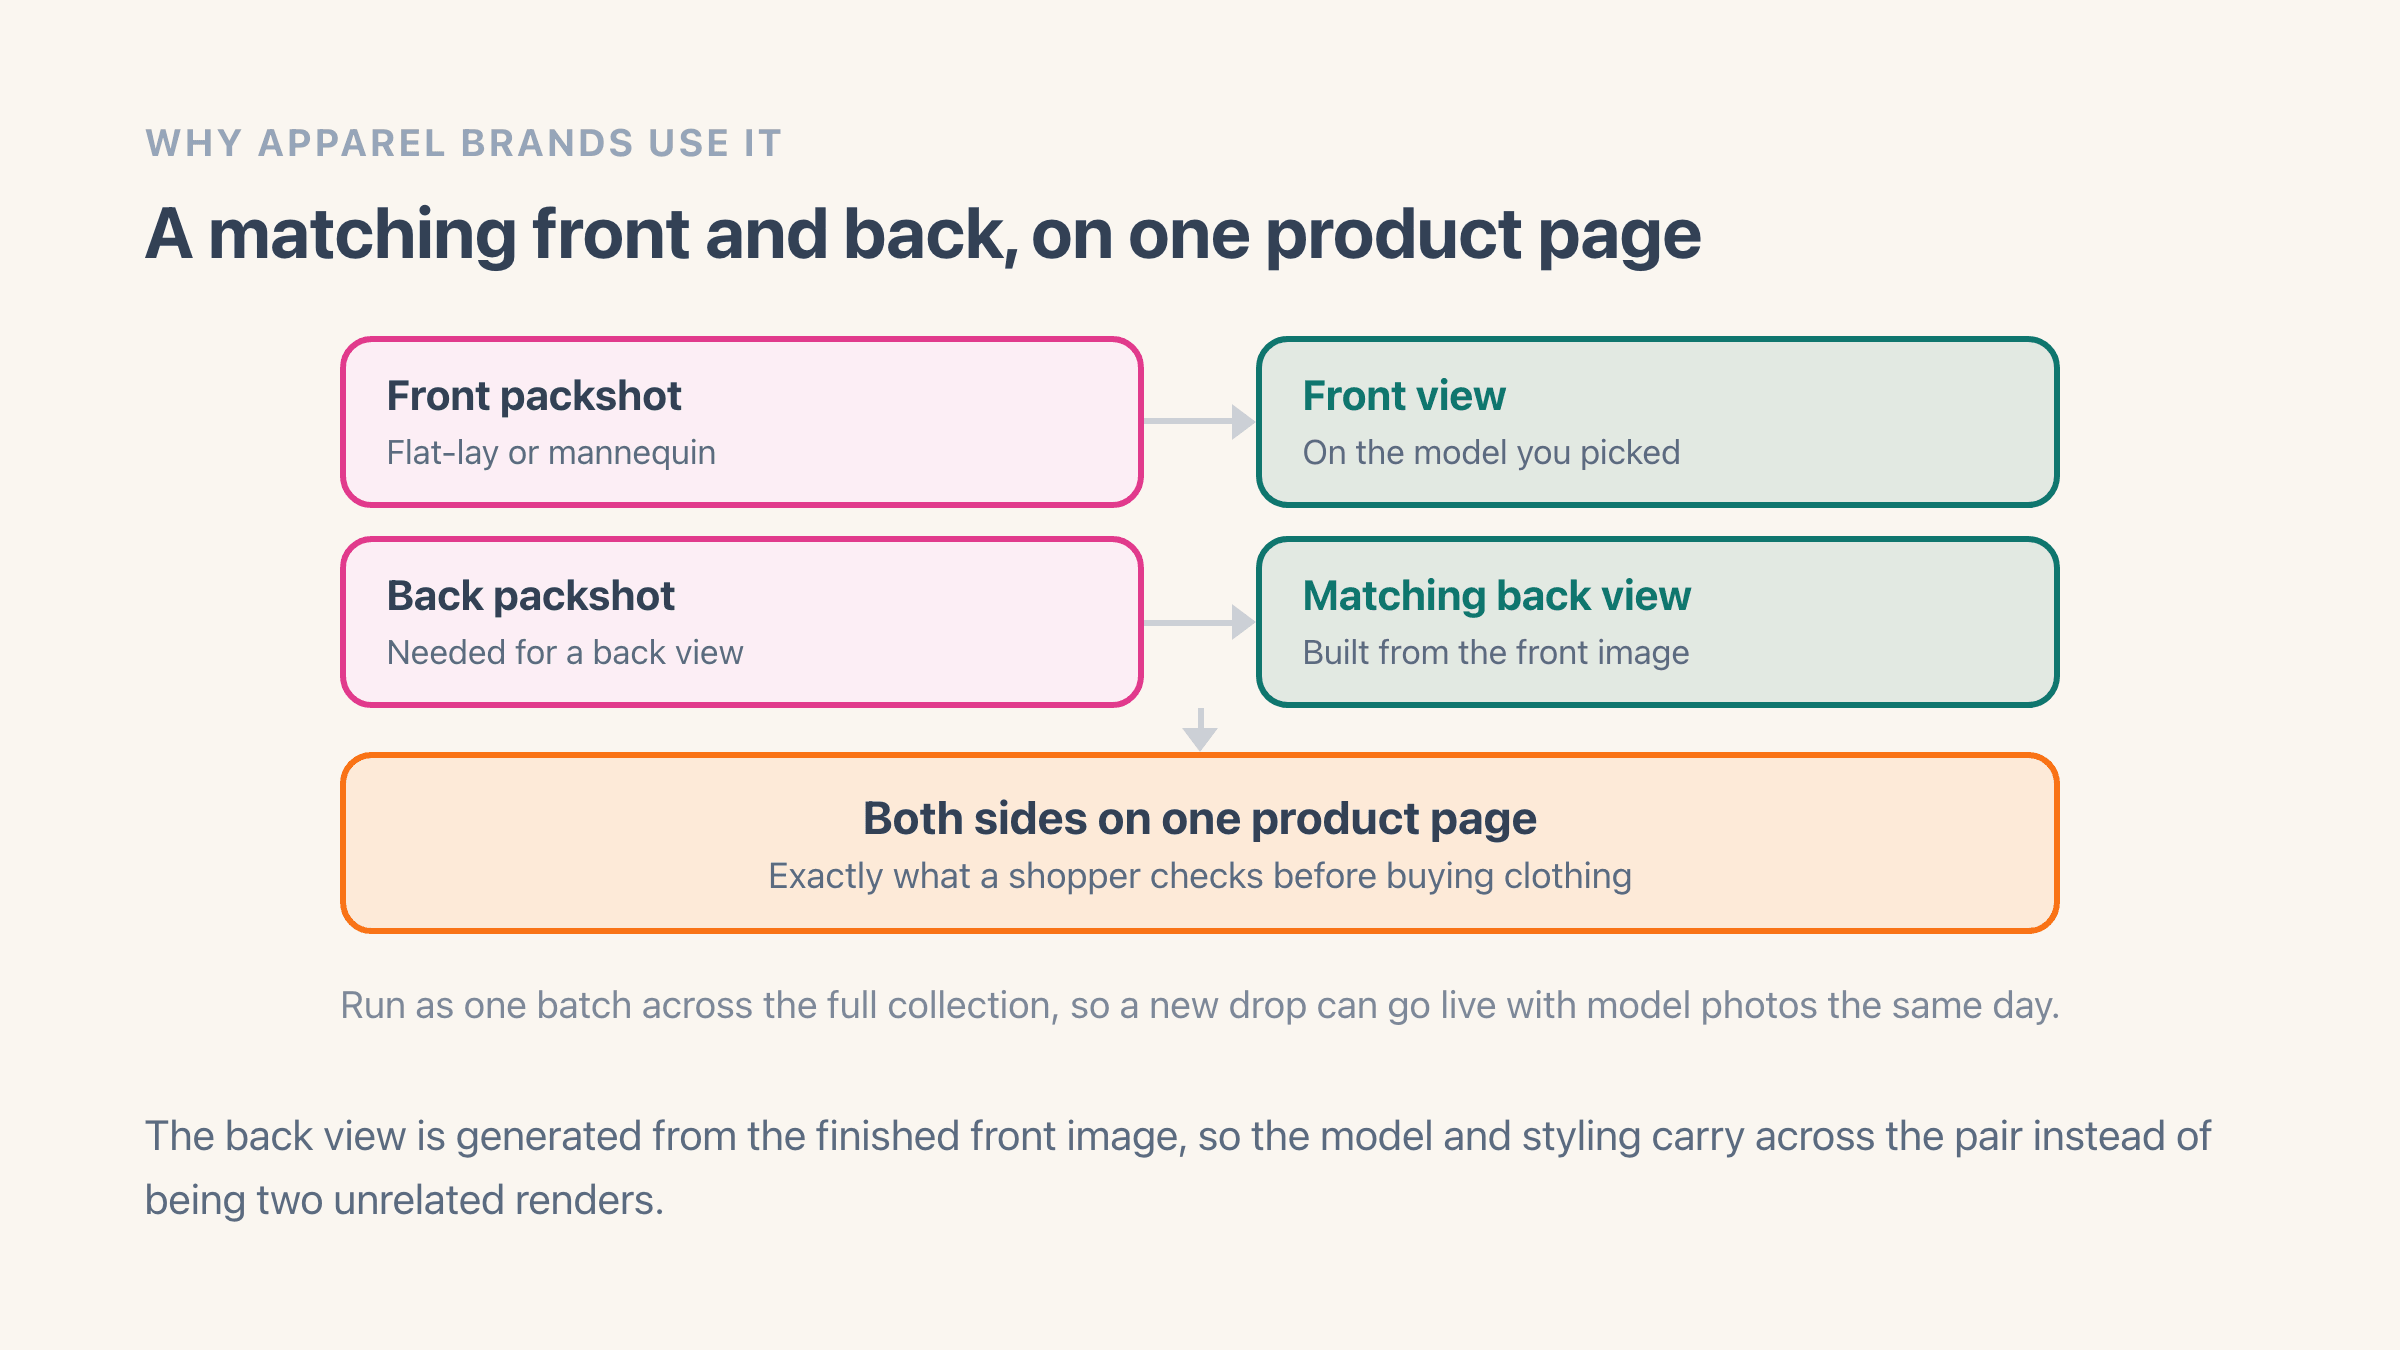
Choose the model and framing, so a top shows as a top and trousers show full length. Generate a front and a matching back view.
If it does not work
You build a collection product by product and it comes back as a grid of different people wearing your clothes, because model identity holds inside a single run and does not carry across separate ones. Queue the whole drop as one job instead.
How to undo it
Model, framing and picture shape are all free to change until you press Generate.
Approve and publish
Review the generated images, approve the ones that fit your brand, and publish them to the product. Anything you skip stays off the storefront, although the credit behind a generated image has already gone by then.
If it does not work
The generated shot becomes the only image on a colour-critical or finely knitted piece, and the returns arrive saying it did not look like that. Keep the flat packshot in the media set as the colour reference, since that one is a photograph of the actual dye lot.
How to undo it
Delete the published image from that product's media in your Shopify admin. Your original packshots are untouched, so the product page goes straight back to what it was.
What you get
- On-model apparel images from flat-lay packshots, no shoot required
- Front and matching back views for full product detail pages
- Model choice with framing and picture-shape control
- Batch generation across a full collection
- Finished upscaled images published straight to Shopify
Why do apparel brands use AI photos instead of a shoot?
Because a model shoot per product is expensive and slow, and it stops scaling the month you start adding dozens of SKUs. PackScene gives apparel brands on-model images from the packshots they already have, so a new drop can go live with model photos the same day it lands.
Front and back views mean a product page can show how a piece looks from both sides, which is exactly what a shopper checks before buying clothing.
Flat lay vs ghost mannequin: which packshot works better?
Both work, and the ghost mannequin is the safer default. A mannequin shot already holds the garment in something close to its worn shape, so shoulders, waist and hem sit roughly where a body would put them and the generated version has less to guess at. A flat lay comes out just as well when the piece is laid properly and the whole of it is in frame.
The gap shows up on structured pieces. A blazer, a coat or a padded jacket keeps its volume on a mannequin, while the same piece flat on a table reads as a rectangle, and the model image can come back slimmer and softer than the actual garment. Jersey basics barely care either way.
Whichever you shoot, three things wreck the result. Creases get drawn as though you designed them, so steam first. A hand or an arm in frame confuses the generation. And a crop that cuts off a hem or a cuff means the AI invents the part you hid from it. For the resolution and file-type floor, see what makes a packshot good enough.
Which framing do you pick for each garment?
Match it to what the garment is. Upper body for tops, shirts, hoodies, knitwear, jackets and bras. Lower body for trousers, jeans, shorts, skirts and swim bottoms. Full body for dresses, jumpsuits, coats and swimwear sets, or anything that hangs from shoulder to hem.
The screen asks you to select one or more framing options, and whatever you tick lands on every product in the run. That is the detail that catches people on their first batch. Put tops and trousers in one job at upper body and the trousers come back cropped; tick lower body as well to cover them and you have bought a second image for every product in the run. Run the tops at upper body and the bottoms at lower body as two separate jobs, and the collection page comes out looking deliberate.
Every image is a credit, so the planning maths is simple. One garment, front only, is one credit. Front and back is two. The same garment at a second framing is another. A 30-piece drop shot front and back lands at 60 credits, which sits comfortably inside the 250 on the $39 plan with room left for redos.
How do you make a whole drop look like one shoot?
Generate it in one run. Model identity holds inside a single run and does not carry across separate ones, so a collection built product by product comes back as a grid of different people wearing your clothes. The same 30 pieces queued together share a face, a background and a light.
You are choosing between a male and a female model, and every image comes back on the same plain grey studio background. That backdrop is fixed in the app, so if you wanted the piece worn on a street or in a room, that is a lifestyle scene and a separate tool does it. Pick the model that matches who actually buys from you, then keep that choice for the season.
Picture shape counts as much as styling. You set it once per run, square, 3:4 or 2:3, and most Shopify themes are happiest with square. Whichever you choose, keep it the same across the collection, because a grid mixing two shapes looks broken in a way shoppers notice without being able to say why.
Which garments does AI struggle with?
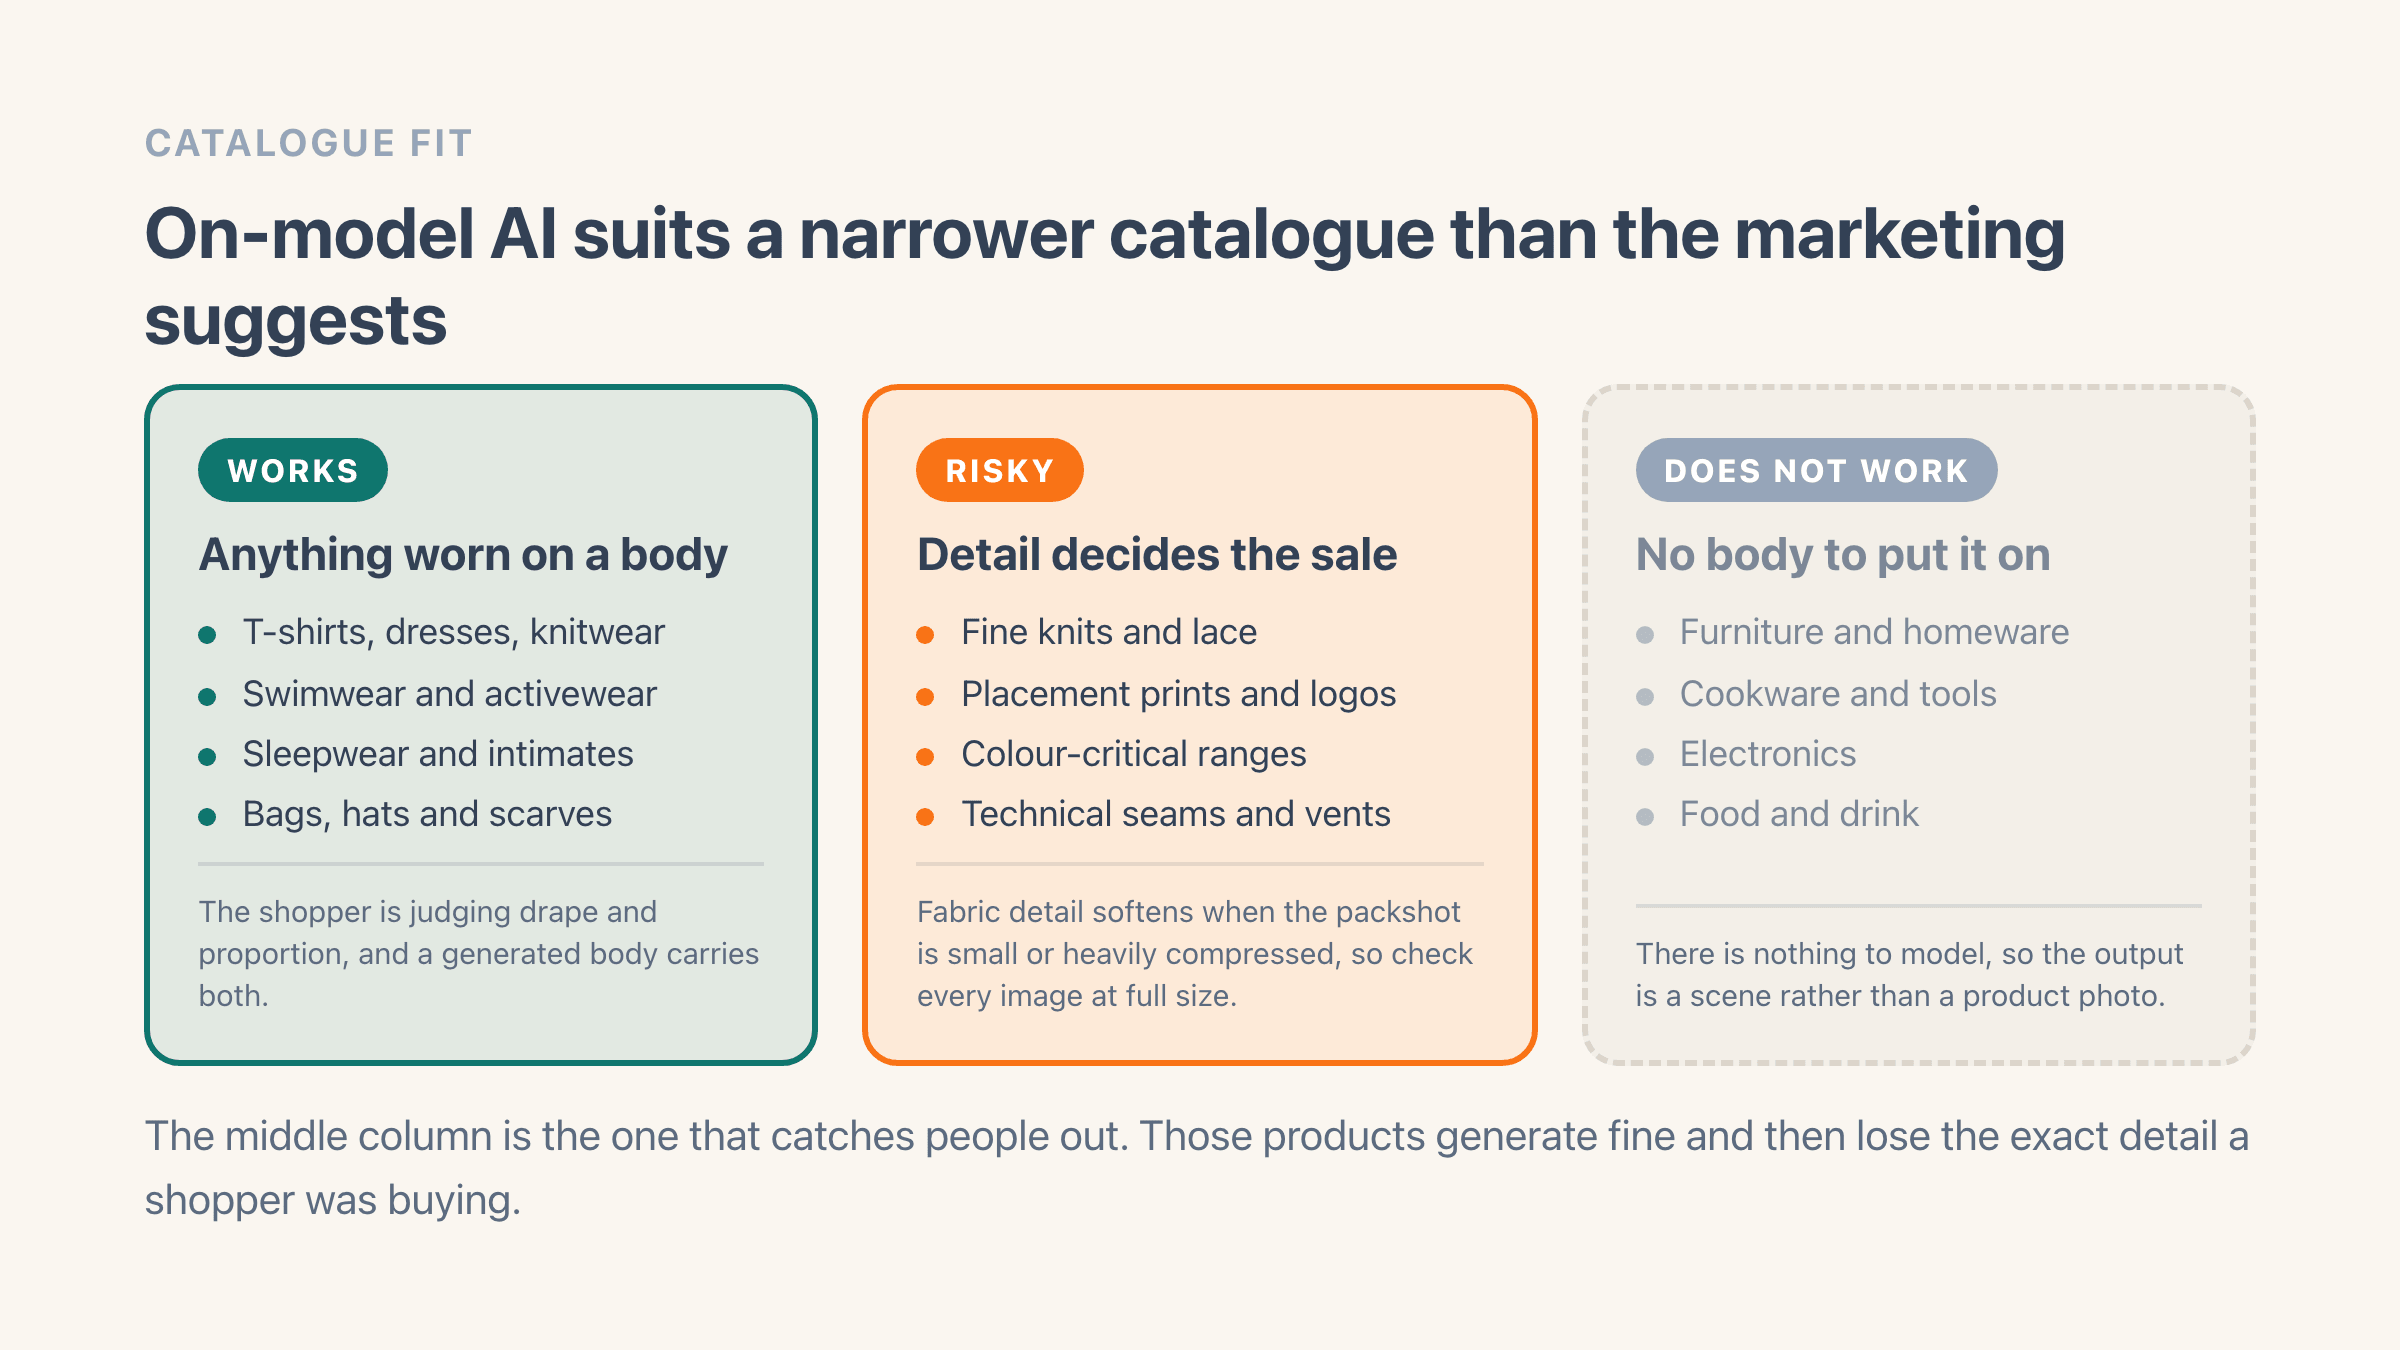
Three kinds, and none of them announce themselves. Fine knits and lace lose their structure and come back as a smooth surface. Placement prints and logos drift, so a graphic that was centred ends up slightly off. Colour-critical ranges shift a shade, which matters enormously if you sell six near-identical navies and not at all if you sell one.
Back-side detail is the other one. If a piece has a vent, an open back, a print or embroidery on the reverse, give it a back packshot as well as a front, because the back view is drawn from what you show it and will not invent a detail it never saw. On a plain-backed t-shirt, front alone is enough and saves a credit.
Judge all of this at full size rather than as thumbnails, and put ten of your trickiest pieces through before committing a season. Hard goods fall outside the app entirely, because furniture, kitchenware and tools have no body to be placed on. The general walkthrough, from picking products to publishing, sits at turning packshots into AI model photos.
Will AI model photos push up my returns?
Nobody has measured it for AI imagery specifically, and the apparel return figures that circulate around this question come from vendors with no stated method. What is worth taking seriously is the reason clothing comes back at all, which is usually that it did not match the picture.
That points at a working rule. The generated body has never seen your size chart and does not know your medium runs small, so it draws a plausible fit rather than a measured one. Keep the flat packshot in the media set as the colour reference, since that one is a photograph of the actual dye lot. Keep a close-up for texture. Put real measurements in the description instead of leaving a shopper to read fit off an invented body.
Nearly all the risk sits in one situation, which is the AI image being the only image. To find out what it does to your own numbers, publish on ten products, leave ten comparable ones alone, and compare returns across the same sixty days. Your store-wide rate will tell you nothing at that size. The wider picture on AI photos and returns carries the survey figures.