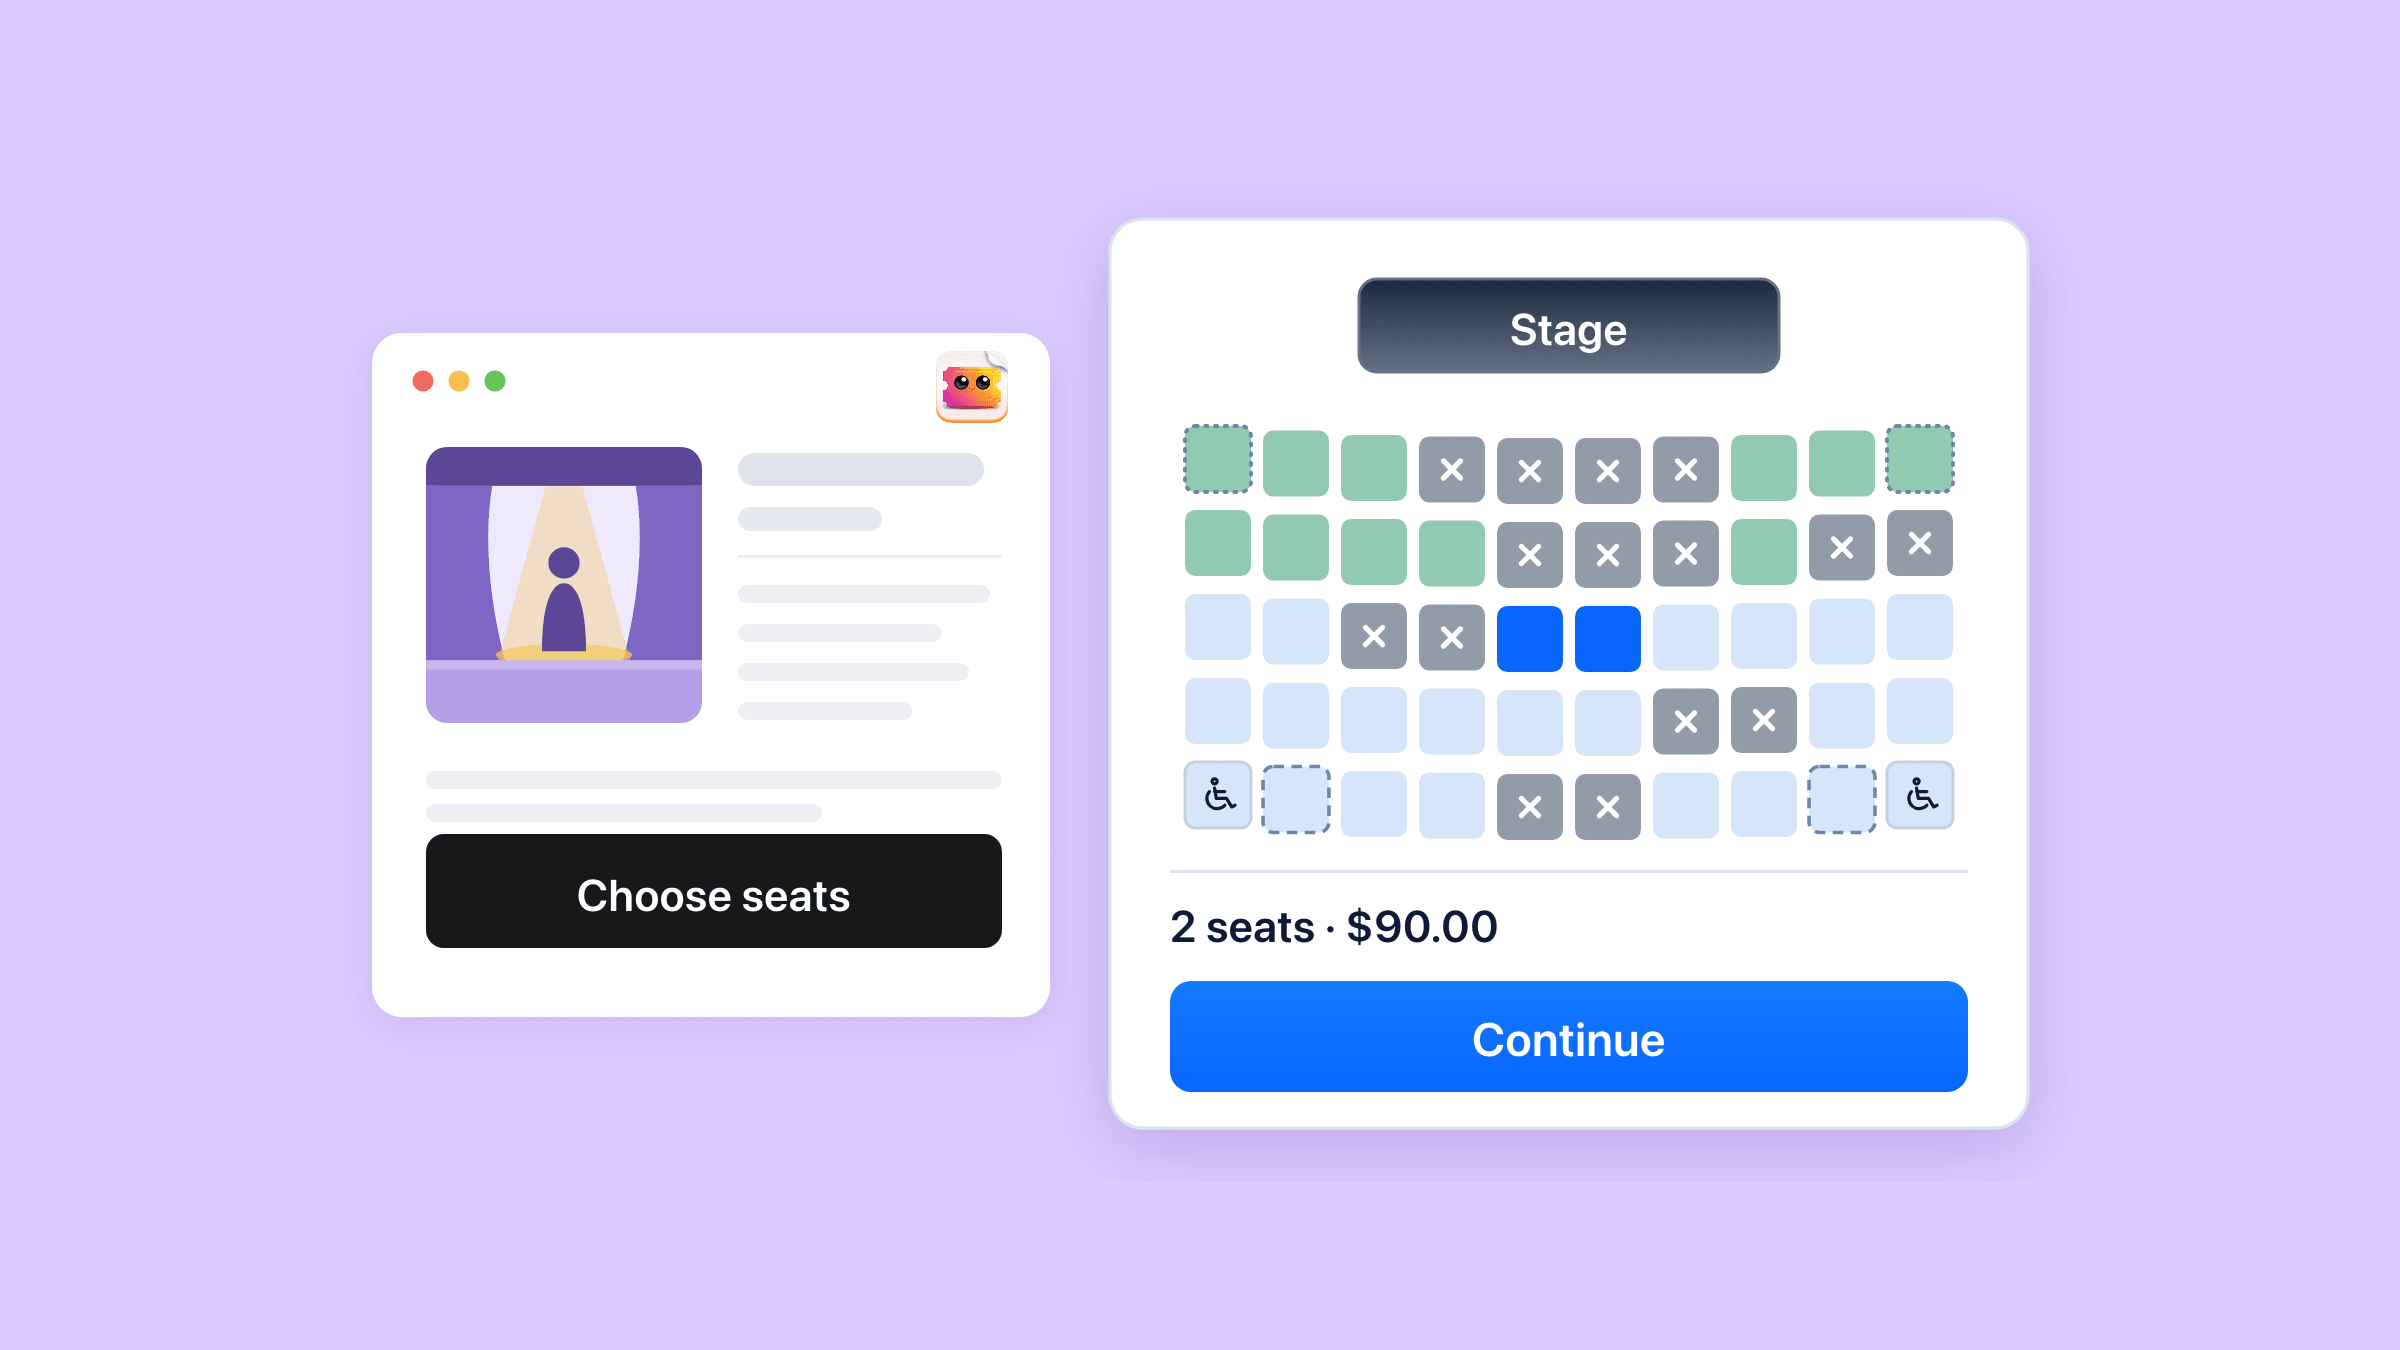
Easy Tickets & Events adds reserved seating to Shopify. You draw your venue once in a seat map editor and attach it to an event, where each price area sells through a ticket type. Shoppers click their own seats, which are held while they pay at your normal Shopify checkout.
On this page
- How do you draw a seat map of your venue?
- How does a seat map become tickets on an event?
- What does the shopper see when they choose a seat?
- How long are seats held while the shopper pays?
- Where does the seat show up after the sale?
- Can you change the seat map after tickets are sold?
- What this does not do
- How do you set it up?
- Who uses this?
- What should you read next?
- Common questions
How do you draw a seat map of your venue?
You draw it once in the Seat maps library, and every event can reuse it.
Select Create seat map and the editor opens on a blank map with one price area, “Standard”. There are no templates to start from.
One map holds up to 5,000 places, counting every seat and every standing place. A single row or table takes up to 200 seats.
Rows, tables and standing areas, drawn with the mouse
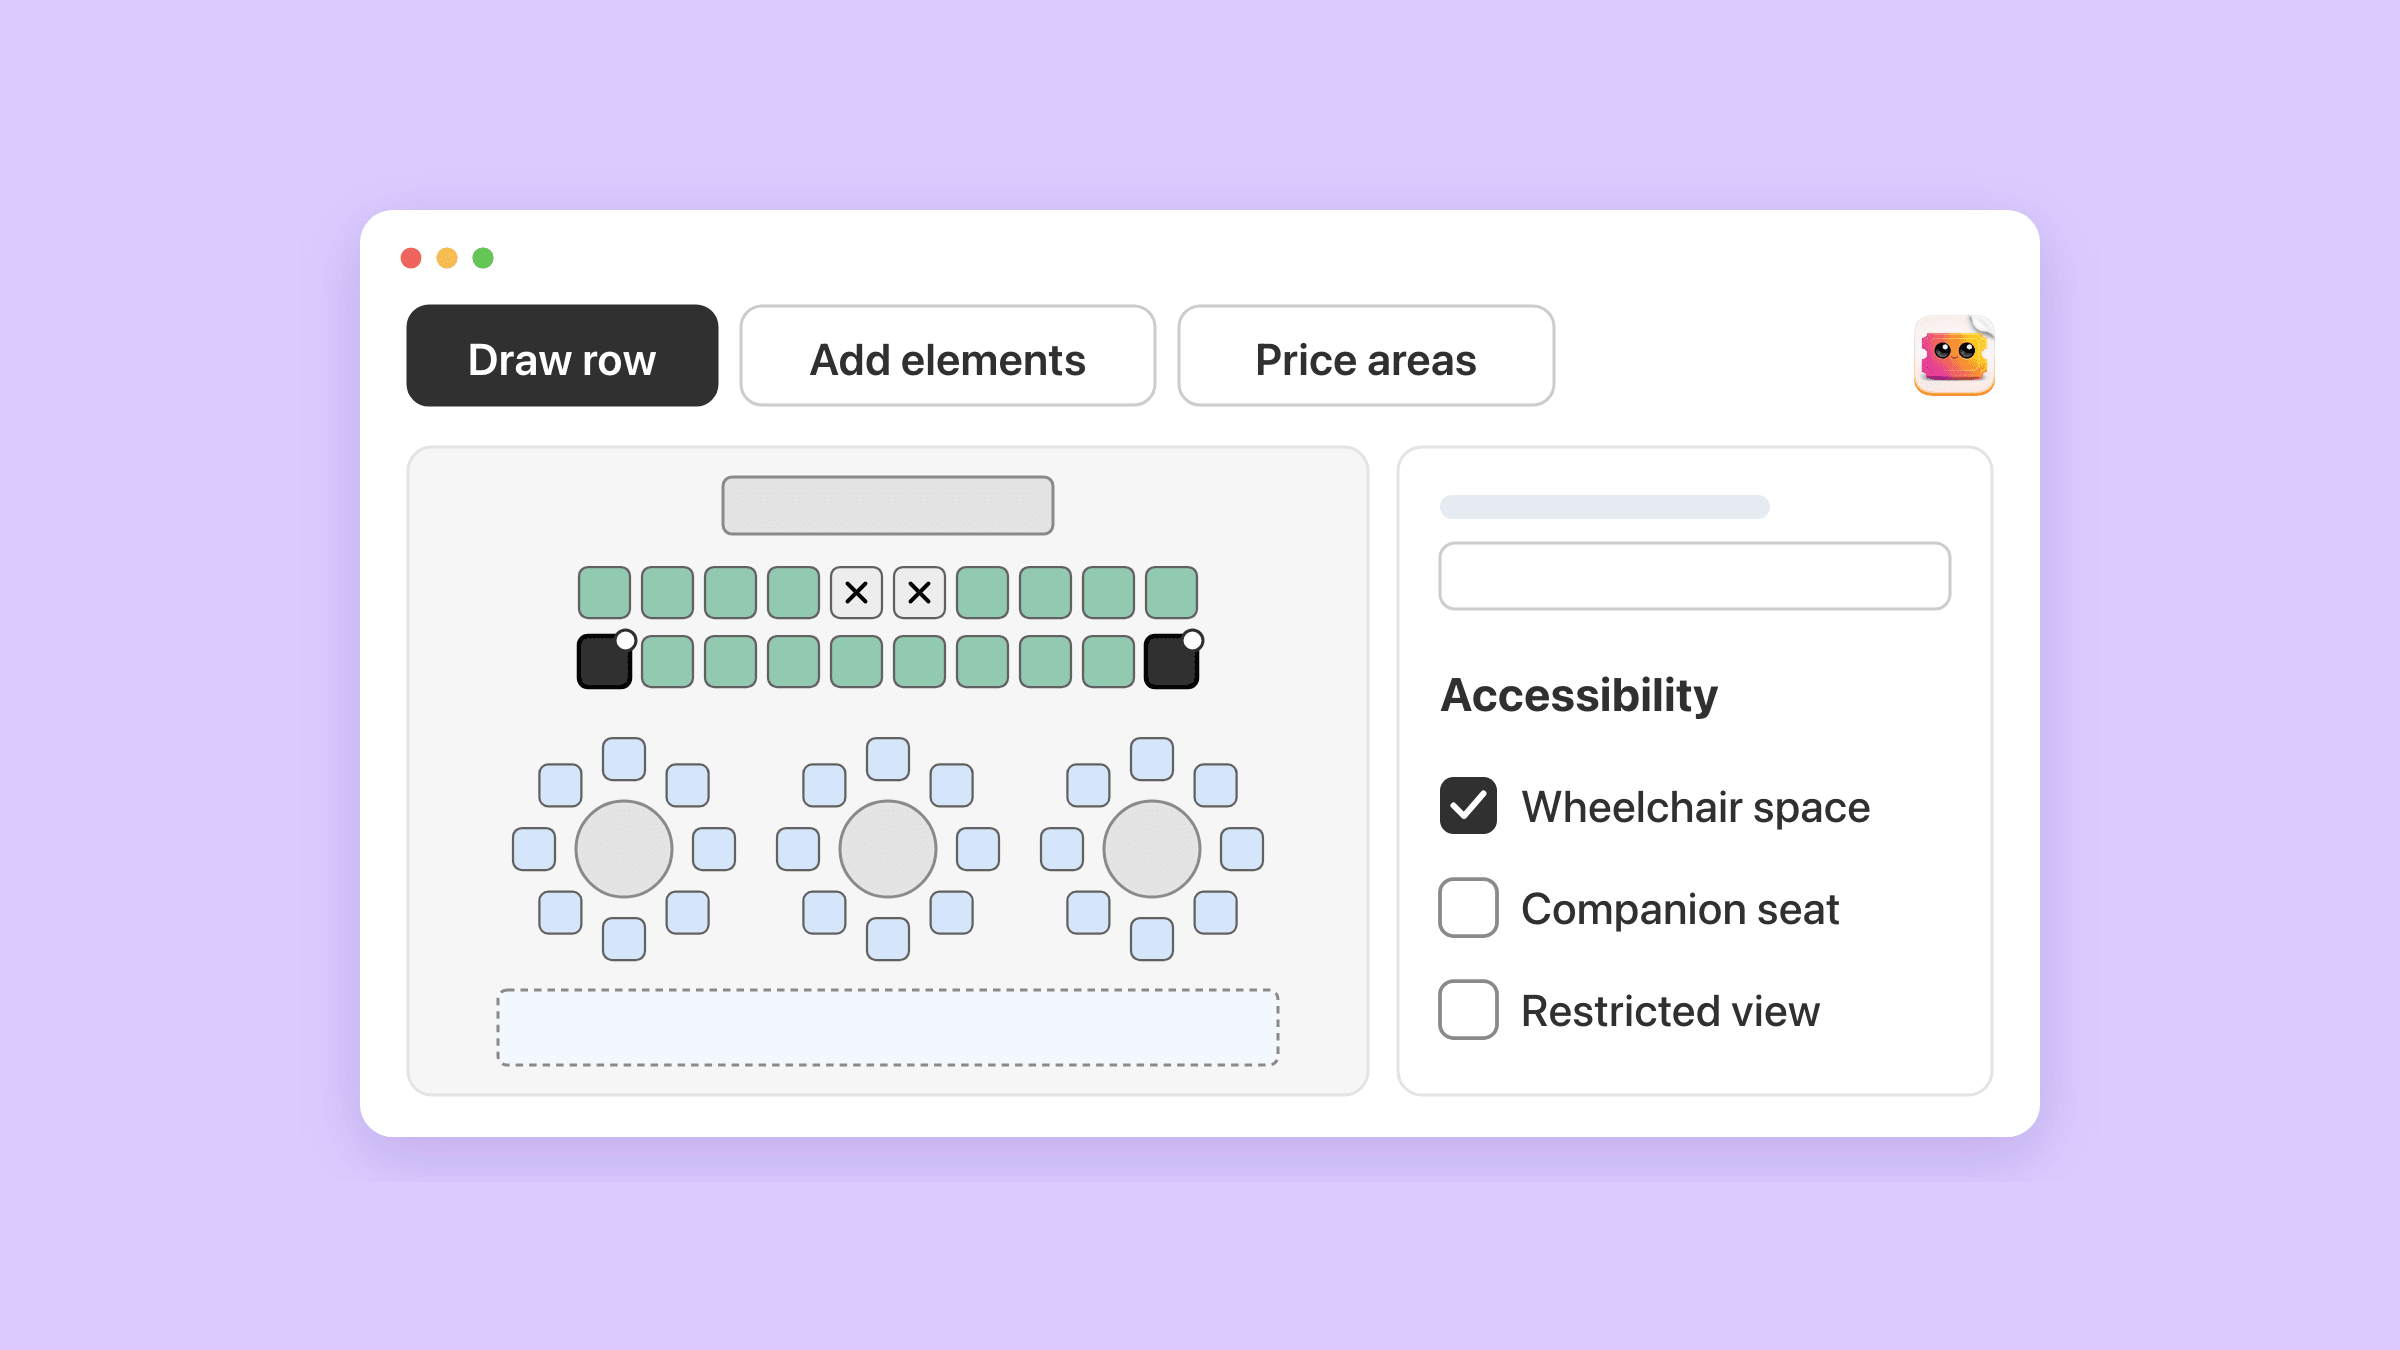
Draw row is the quick way in. Press and drag across the map, and a straight row of evenly spaced seats appears when you let go.
- Add rows starts at five rows of ten seats, named A, B, C and onwards.
- Add tables places round or rectangular tables, six tables of eight chairs to start.
- Add standing area draws a box of unnumbered places, 50 to start.
- Add stage or landmark draws a stage or a bar that is never sold.
Price areas carry a planning price, not the ticket price
Price areas group seats by what they cost, up to 30 on one map.
Each has a name, a colour and an optional default price. That price only fills in the ticket price when you create an event, and shoppers never see it.
Wheelchair, companion and blocked seats are marked seat by seat
Select seats and tick Wheelchair space, Companion seat or Restricted view under Accessibility. Anyone can still buy them, because the mark labels the seat and checks nothing about who takes it.
Unavailable in this layout takes a seat out of sale for every date on this version of the map, like the one behind a pillar.
How does a seat map become tickets on an event?
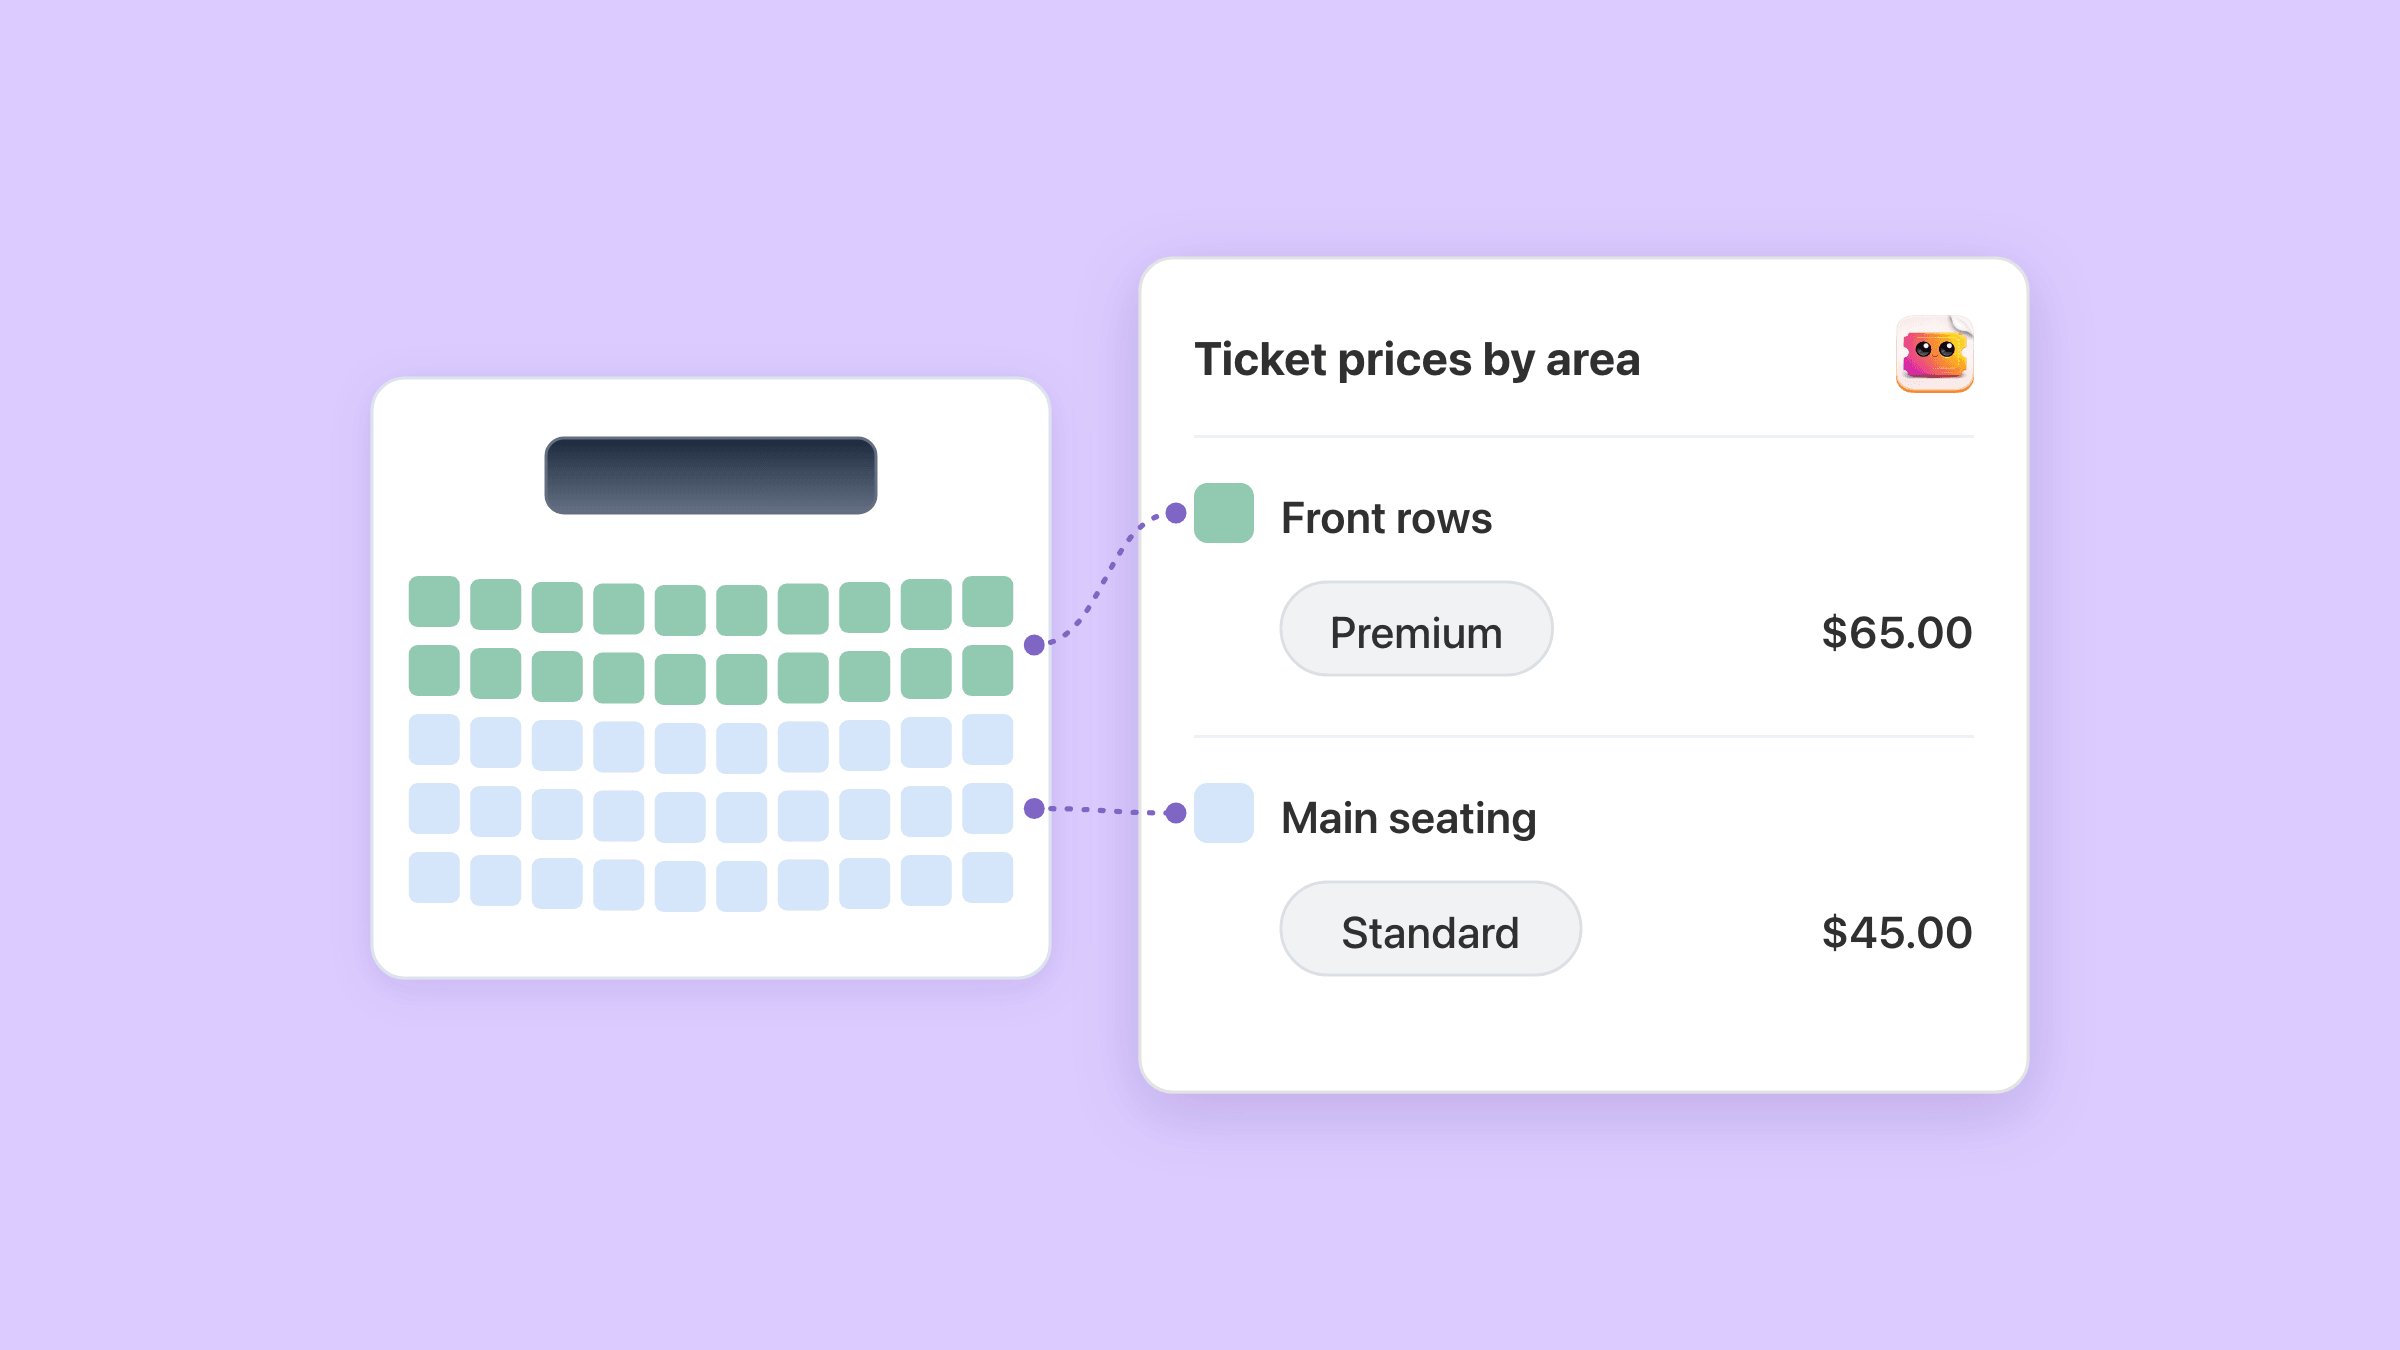
Each price area on the map sells through one or more ticket types, and each ticket type carries one price.
Select Create event and choose Reserved seating rather than General admission. Pick your map under Choose a saved map, and the form suggests one ticket type per price area, priced at the area's default.
On a seated event the map is the stock. Every sellable seat and standing place is one admission, and a ticket type sets a price, never a quantity.
Several ticket types can share one price area
The Reserved seating tab lists every area under Ticket prices by area. Give one area an Adult and a Child type, and the shopper picks the type for each seat.
The Tickets tab turns read-only on a seated event, because prices and areas are set here.
Individual seats or whole tables
What customers buy decides what one click sells. Individual seats is the default, and Whole tables sells a table in one click, with every seat at it becoming its own ticket.
Whole tables needs a map with no rows or standing areas, and each table in one price area. The price is charged per seat and multiplied by the chairs at the table.
Seat sales open once three checks pass
The Seat sales switch at the top of the tab opens by itself on the first publish, as soon as the date passes these checks.
- The date has a Shopify product of its own.
- Shopify's checkout validation permission is granted, which Enable checkout validation access on the tab asks for.
- Every ticket already sold on the date has a seat, which matters when a general admission event gets a map later.
What does the shopper see when they choose a seat?
Your buy button changes to “Choose seats”, and it opens the seat chooser over your product page.
The theme's own button is hidden and an identical-looking one takes its place. The quantity box and the ticket type picker go too, because the seats are the tickets.
One fitted view of the whole hall
The chooser shows the whole hall at once, with no zoom. On a big venue the Floor and Section selects narrow it down.
- “Show price areas” paints the seats in their area colours, on maps with more than one area.
- “Show seat list” turns the map into tick boxes, and a keyboard walks the map with the arrow keys.
- Wheelchair spaces carry an icon, companion seats a dashed edge and restricted-view seats a dotted one.
- Sold seats, seats in another shopper's hold and seats you blocked are all grey with a white cross, labelled “Unavailable”.
One click to hold, then a name for every seat
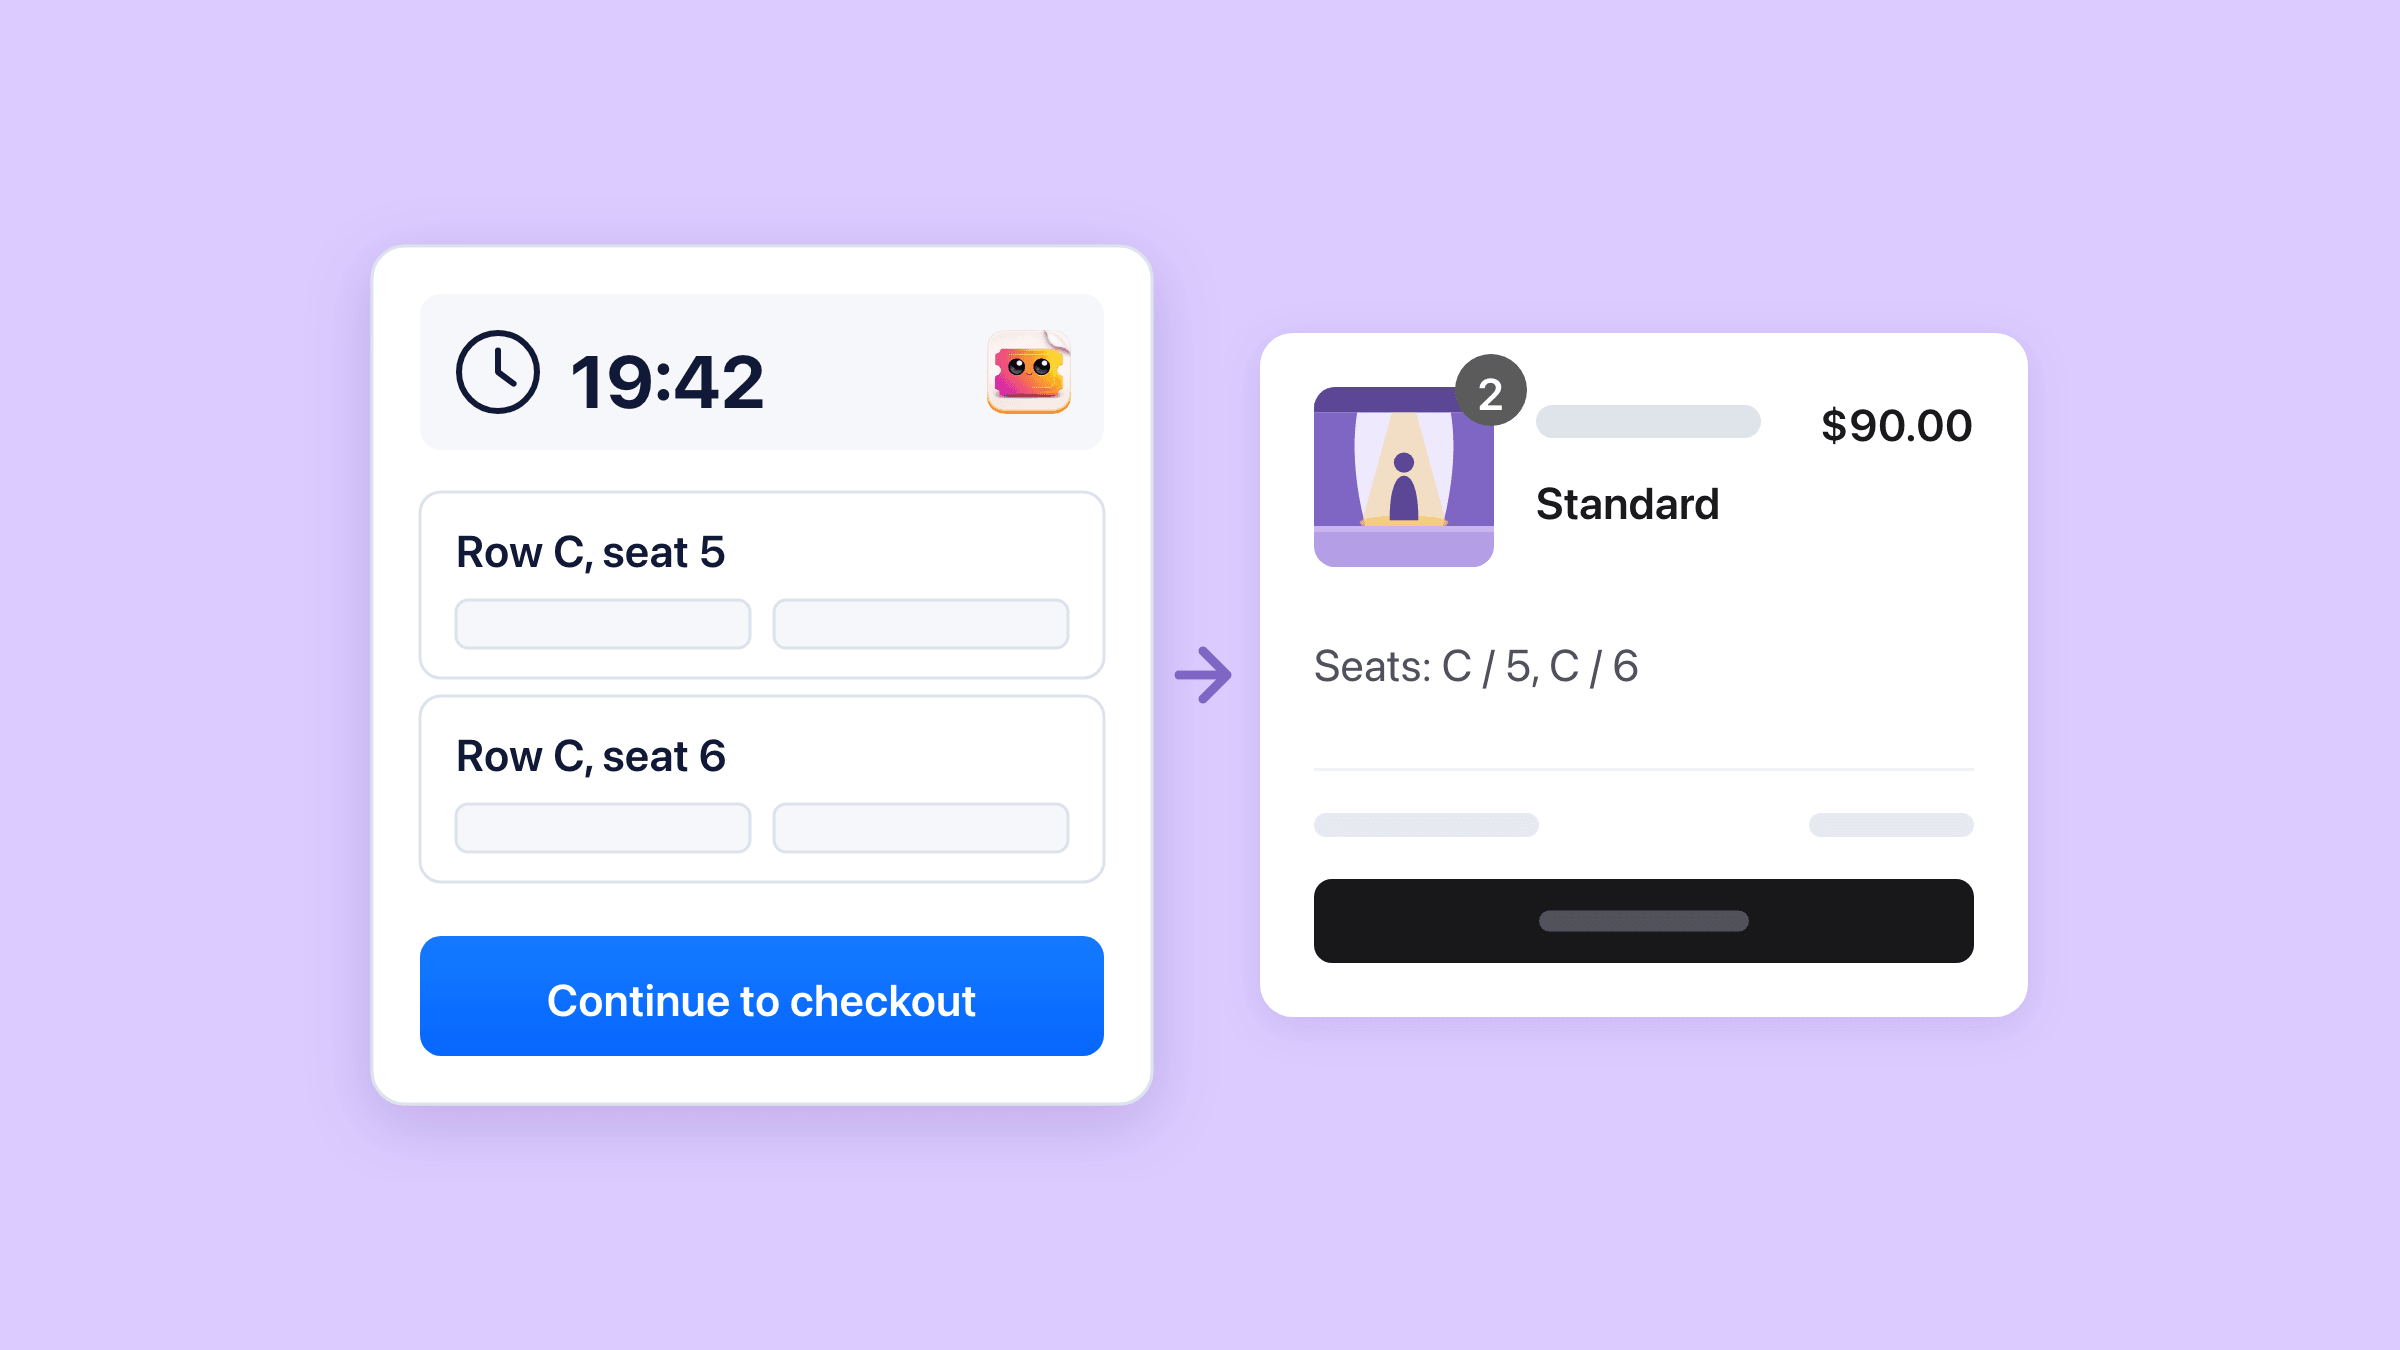
Picked seats land under “Your seats” as “Row C, seat 5” with their price. The panel states the limit up front, such as “You can choose up to 10 seats.”
“Continue” holds the seats and opens “Enter ticket details”, a card per seat asking for a first name, last name and email. With two or more seats the shopper can tick “Book all seats under one name”.
From there, “Continue to checkout” fills the Shopify cart and “Change seats” goes back to the map with the picks kept.
Let's try it. Pick a seat or two, then click one of the grey seats that are already sold.
How long are seats held while the shopper pays?
Twenty minutes by default, and you can set anywhere from 5 to 30 minutes per date under Hold time in minutes.
While the guest form is open, the hold renews itself, up to three times the hold time in all. At the default 20 minutes that is one hour at most.
The timer starts when the shopper continues
Before anything is held, the chooser says “Your tickets will be reserved for” with the hold time and “Starts when you continue”. After that it counts down.
If it runs out, the seats go straight back on sale and the shopper's typed details stay on the page.
Seats go through your normal Shopify checkout
“Continue to checkout” adds one cart line per ticket type, with the seats listed under it, such as “Seats: C / 5, C / 6”. Your discount codes and payment methods work as usual.
A checkout rule blocks any seated ticket that arrives without a hold, from a cart link, a reorder or a quick-add button. The shopper is told the tickets “need a seat”.
Two shoppers never end up with the same seat
Each seat belongs to one hold, order or ticket at a time, so the second shopper to reach a seat is told it has gone.
A payment that lands after its hold ran out still gets the seats if they are free. If someone else bought them, no tickets are made, and the order waits for you under Seat orders that need attention.
Where does the seat show up after the sale?
Every seat becomes its own ticket, with the seat printed on the ticket email, the PDF and the online ticket page.
- The guest list gets a Seat column, and its search finds a guest by seat.
- The door scanner and the Shopify POS check-in list show the seat with each guest.
- The CSV export carries a Seat column whenever a row has one.
You move, block and release seats on the Attendees tab
Change seat and Release seat sit in each guest's row menu, and Assign or move seats handles up to 100 tickets at once. Seat changes send no email, so resend the ticket to anyone who needs the new seat.
Manage reserved seating opens the map for one date. Block seats takes seats out of sale there, or you set them aside for a private code of at least 16 characters.
Refunds free the seat, and a partial refund waits for you
Refund a whole ticket line in Shopify, or cancel the order, and those seats go back on sale. The tickets stop counting toward your plan.
A partial refund of a line frees nothing, because the app will not guess which seat you meant.
Cancelling a ticket inside the app keeps its seat until you press Release seat.
Can you change the seat map after tickets are sold?
Yes, and the dates already selling keep their version until you move them.
Every save makes a new version, and dates keep theirs
A date on an older version shows “Version 3 is available” with Use the latest version beside it. On a series, Use the latest version on all upcoming dates switches every date with no seats sold or held. The rest wait for you to confirm.
Sold seats keep their seat, or wait for a new one
Seats are matched by the seat itself, not its name, so a map rebuilt from scratch shares no seats with the old one.
A ticket whose seat the new map drops keeps its code but loses the seat. Seat sales on that date pause until you give it a new one on the Attendees tab.
- A sold or held seat keeps its name, number and price area; moving it on the drawing is fine.
- Remove seating turns a date back into general admission, but only while no seat is held, in checkout or sold.
A seated series sells one product per date
A seated series needs Separate product page per date on the create form, so the one-product date picker from time slots cannot sell seats.
Each date gets its own map and its own Seat sales switch. Dates added later are listed under Finish seating setup, with checkout closed until you publish their map.
What this does not do
- No best-available button. Shoppers always click their own seats, on the map or in the seat list.
- No zoom or pan in the shopper's chooser. The whole hall is fitted to the screen.
- No seat selling at the Shopify POS till. A seated event is refused there, though POS check-in shows the seat.
- No templates, no floor-plan image to trace over, no import or export, and no delete. A map can only be archived.
- No shared date-picker product for a seated series. Every date needs its own Shopify product.
- No seat maps on online events, and no free registration without checkout on a seated date.
- No per-seat prices. A seat costs what the ticket type the shopper picks for it costs.
- No email to guests when their seat changes, and no way for customers to change their own seat.
- No waiting room for a big on-sale. When too many seats are held at once, new shoppers are asked to try again in a minute.
How do you set it up?
Draw the venue in Seat maps
Open Seat maps and select Create seat map. Add rows, tables, a standing area or a stage from Add elements, or drag out rows with Draw row.
Open Price areas to name each area and give it a default price, tick the Accessibility boxes on the right seats, then save.
Found under Easy Tickets & Events > Seat maps > Create seat map.
Create the event with reserved seating
Select Create event and choose Reserved seating. In the Reserved seating section, pick your map under Choose a saved map.
Under Ticket types, check the ticket type the form suggests for each price area, and set What customers buy to Individual seats or Whole tables.
Found under Easy Tickets & Events > Events > Create event > Reserved seating.
Check the Reserved seating tab
Open the event's Reserved seating tab. If the Seat sales line asks for checkout validation, select Enable checkout validation access.
Under Ticket prices by area you can give an area a second ticket type. Set Hold time in minutes and, if you want it, switch on Don't allow a single empty seat. Preview seat selection shows the shopper's view.
Found under Easy Tickets & Events > Events > [your event] > Reserved seating.
Open the product page
Let's finish on the storefront. The event's buy button already reads “Choose seats”. For a second button somewhere else, open the product template in the theme editor, select Add block and choose Seat picker.
The reserved seating guide covers every setting on the tab.
Found under Shopify admin > Online Store > Themes > Customize > Products.
Who uses this?
Theatres and community stages
Front rows at one price, the rest at another, two wheelchair spaces with a companion seat each, and the sound desk out of sale.
Dinner shows and gala nights
Round tables of eight sold whole in one click, with every guest at the table named on a ticket of their own.
Cinemas and screening rooms
Don't allow a single empty seat keeps bookings side by side, so no lone seat is stranded between two groups.
Comedy clubs and gigs
Numbered tables at the front and a standing area at the back, sold from one map and one product page.
Read the guideWhat should you read next?
Building a seat map, step by step
Every tool in the editor, from Draw row and price areas to sections, floors and accessible seats.
Class packs and class passes
Pass holders book a seated class with one credit, and one credit books exactly one seat.
Time slots and timed entry
Several start times from one product page, for events where the time matters more than the chair.
Sell event tickets on Shopify
The whole setup for tickets through your own checkout, from the first product to the door.
See every Easy Tickets featureRead the setup guide in the manual